2023.11.07 - Post Storm Ciarán Cleanup
I left Naiad somewhat hastily after my last visit, Storm Ciarán had passed by during the night and I had to get home smartish and anticipated a wet return to shore due to the rain. There was, however, a break in the rain and I made use of this to get ashore and into the car before it started again. As a result I didn't stow things away and rig Naiad properly in that I didn't fit the bird netting. I'm not sure I would have been able to do that if I had not have been in such a rush since, although Storm Ciarán had passed, the wind was still quite strong and had I not been sheltered by Cobmarsh Island I would have hesitated to leave the boat.
So, I made a quick Visit to Naiad yesterday to finish the packing, so to speak. Normally, when I arrive at the mooring the first thing I do is to untwist the mooring lines, only this time they were not twisted at all, which was good news.
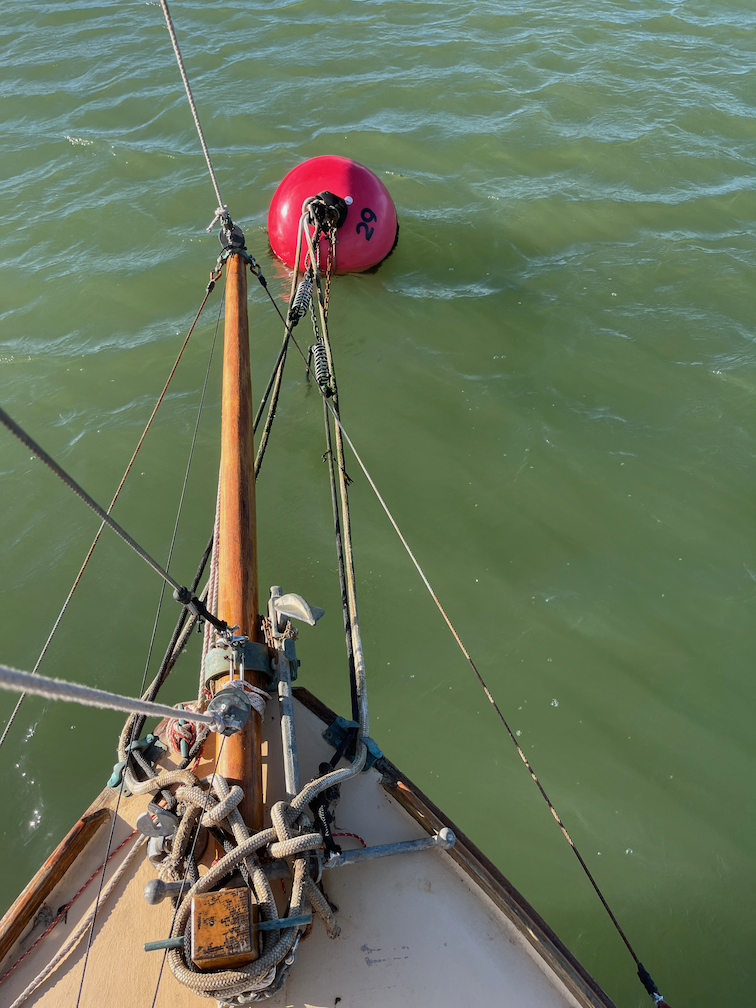
This is more or less how I left the mooring with four lines from the buoy to the boat. However, I did notice that all was not quite as it should be.
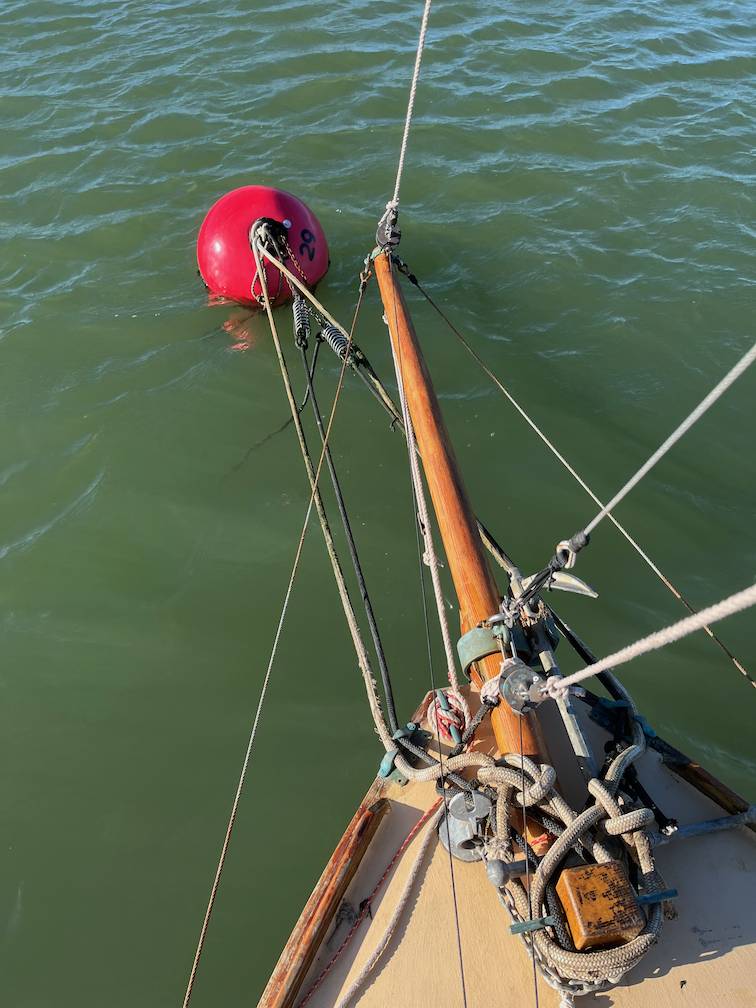
One of the lines has become untied from the buoy and you can see it trailing in the water. Fortunately, I had chained the end of the mooring spring to the buoy for exactly this eventuality and Naiad was still moored with four lines.

The foredeck does look a little cluttered, but that's better than having the boat break loose and drift away.
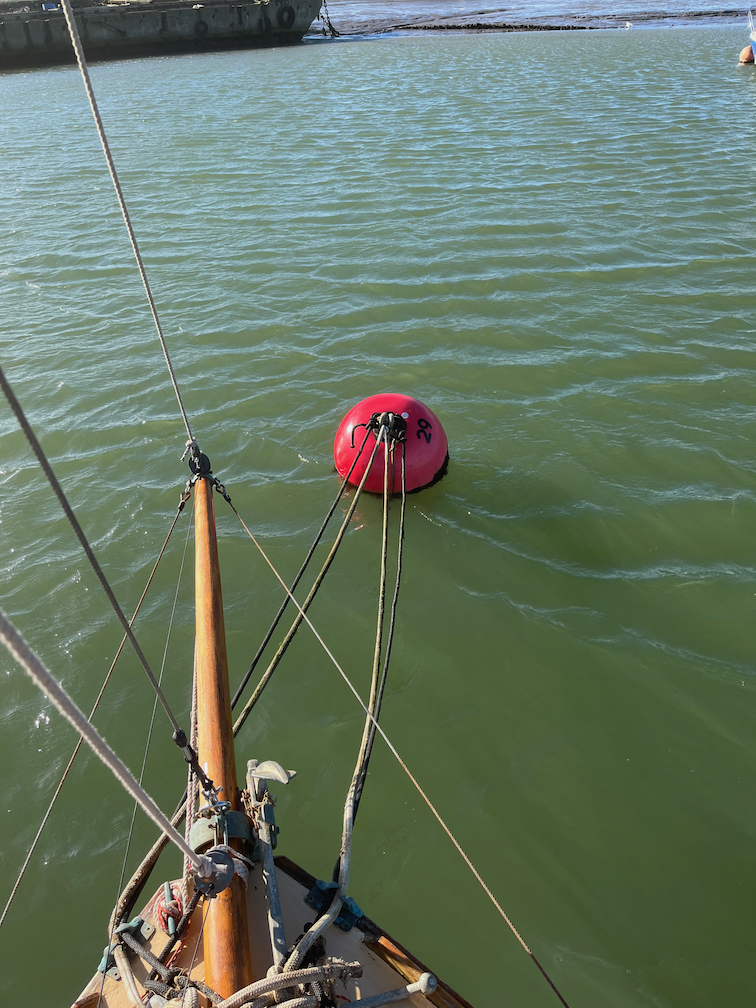
I used the dinghy to get close to the buoy and I was going to tie the line back again but I noticed that the chain was becoming very worn by the action of the salt water, so I took it and the springs off and tied the lines back to the buoy with the additional metalwork.
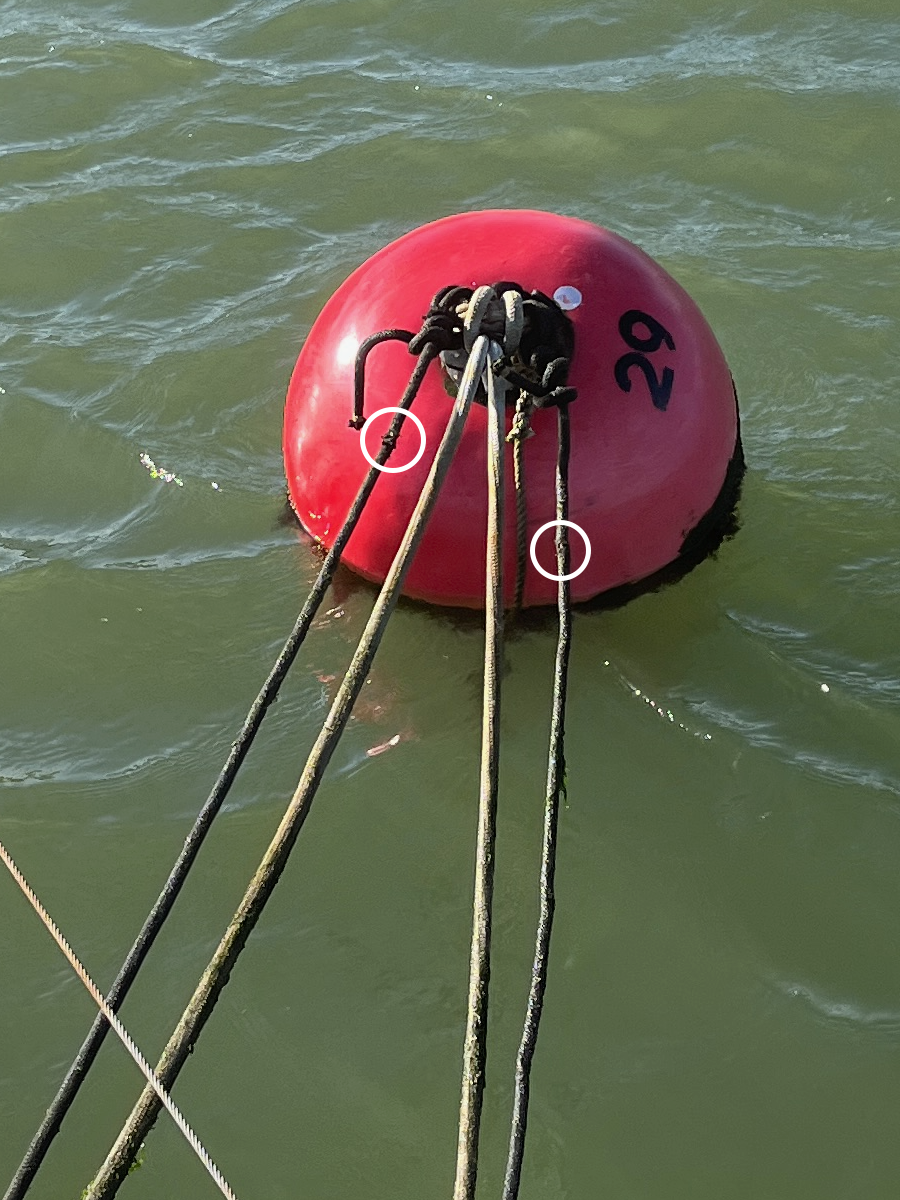
I also noticed that the outer braid of the black lines had become frayed. Above is a close up taken from the photo above the one above and I've circled the frayed areas so that you can see them. These two lines have a black outer braid and an inner core. The core provides the strength and the outer is there mainly to protect the core from chafe. As such the lines are safe as they are but need to be replaced.
Yet another task on the list.
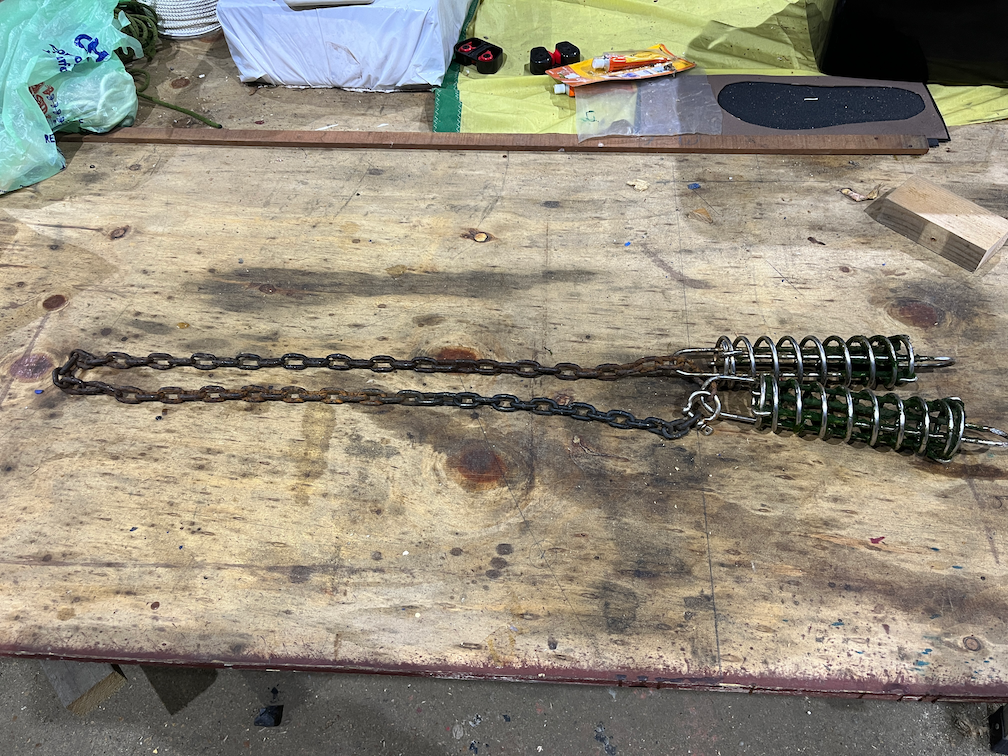
I took the chain and springs home and here they are, cleaned up a little and laid out on a table.
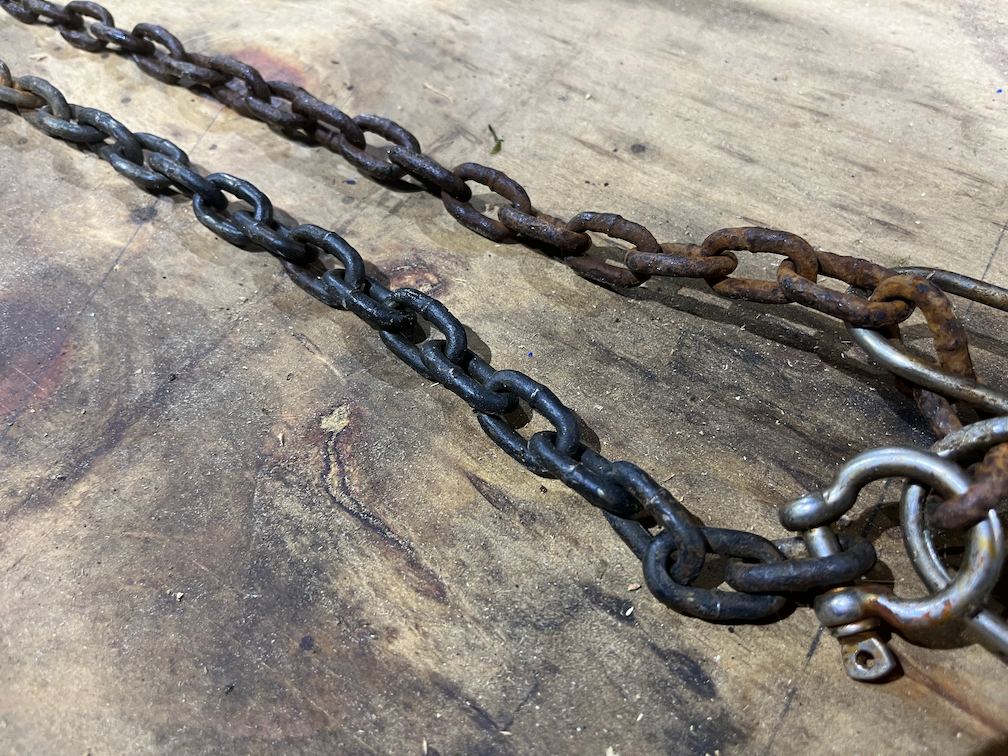
The lower section of chain in the photo is fairly good, not rusty and probably didn't spend much time in the water. The upper section is very rusty and has had a lot of salt water splashing on it.
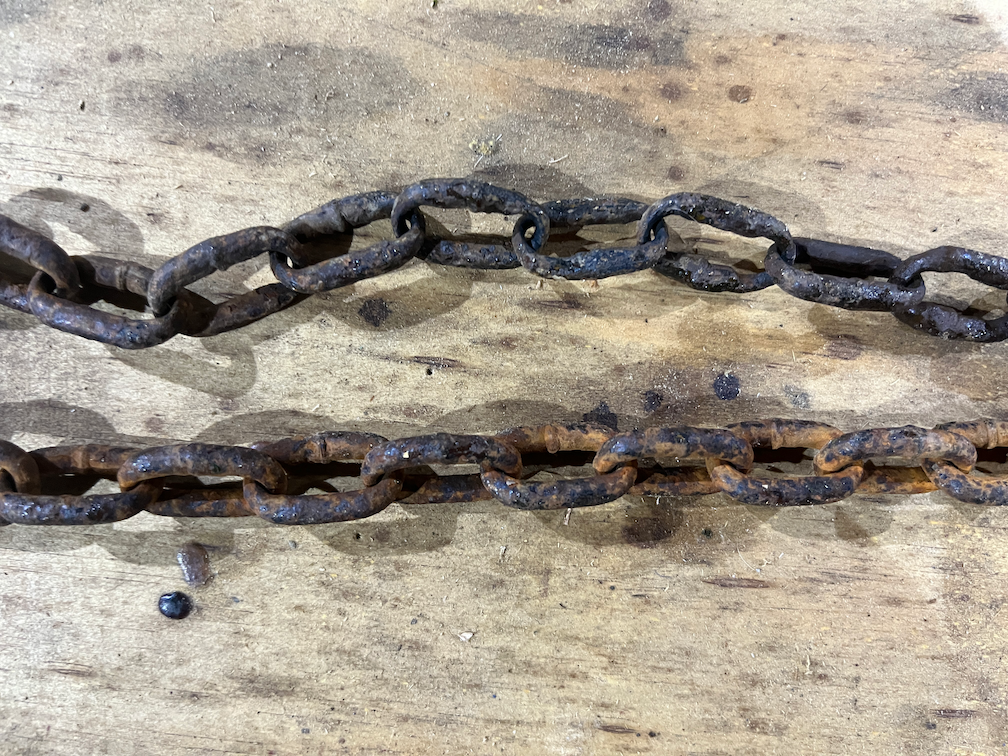
Further down the chain you can see why it needed to be replaced. The links on the lower chain are still full thickness but in the upper chain you can see that the links have worn away considerably. They get rusty from salt water spray, then the boat surges backwards and forwards and the motion causes the rust to wear off. New rust forms and get worn away and so the metal of the links is worn away by this repeated rust and chafe action.
I've decided that since the springs are not really suitable for a buoy mooring, they are for mooring to a pontoon or a jetty, I'm going to replace them with just ropes. These ropes will have a large eye at either end. One eye will be used to attach the line to the eye of the buoy and the other eye will drop over the sampson post.
So, the reel of rope is on order and I'm brushing up on my braid on braid eye splicing.
Time for a cup of tea.
2023.11.01 - Storm Ciarán
With Storm Ciarán due to make landfall during the evening and night of 1st November 2023 I kept a careful eye on the weather forecast updates to see how badly or not we would be hit and also how it would affect Naiad.
The day before the expected arrival of the storm with its Violent Storm force 11 gusts I decided that I should go down to Naiad and spend the night on her at the very least since I did not leave her in a condition to survive such winds undamaged. I left as soon as I could aiming to arrive some time after High Water since it was high enough to cover the Strood. I didn't have much daylight so launched the dinghy and rowed out as soon as I could. Before even boarding I sorted out the mooring, which had become twisted, and attached the two additional very think lines that I had just left lying on the foredeck.
Shortly after boarding I realised that I had forgotten to lock the car doors and I had left my travel mug inside. I rowed back to the Hammerhead, walked to the car in the City Road carpark, drove it down to the club carpark which was virtually empty by this time, retrieved the mug, locked the car and went back to Naiad.
I took down the two headsails, rolled them up and stowed them on the port bunk below. The rain had not started by then so they were completely dry. However, that changed shortly after I had stowed the sails so I rigged the cockpit cover, not an easy job from underneath, which gave me the entire cockpit as storage space.
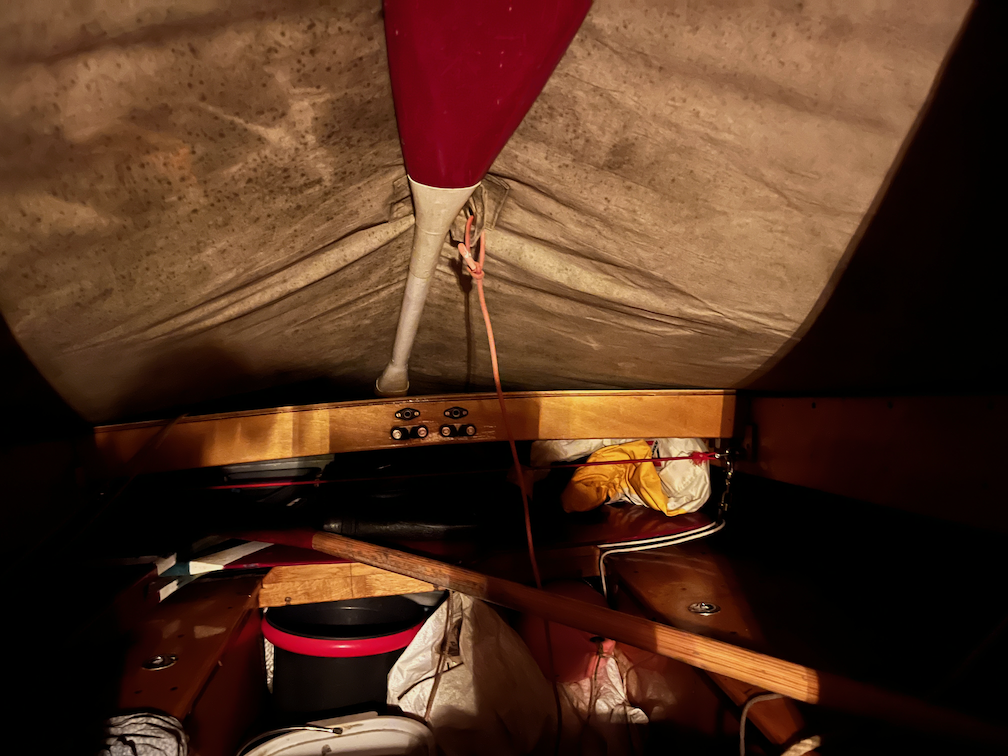
This is what it looked like from inside the cabin looking out. The paddle acts as a ridge pole and prevents the canvas from sagging and allowing rainwater to pool in the middle.
At this time it was only moderately windy and there was virtually no chop. It was also dark and I had the rest of the evening before things became interesting, so I got out my office laptop which I had brought with me since I had something to finish and continued code development using the work smart phone as an Internet HotSpot. I had really good connectivity.
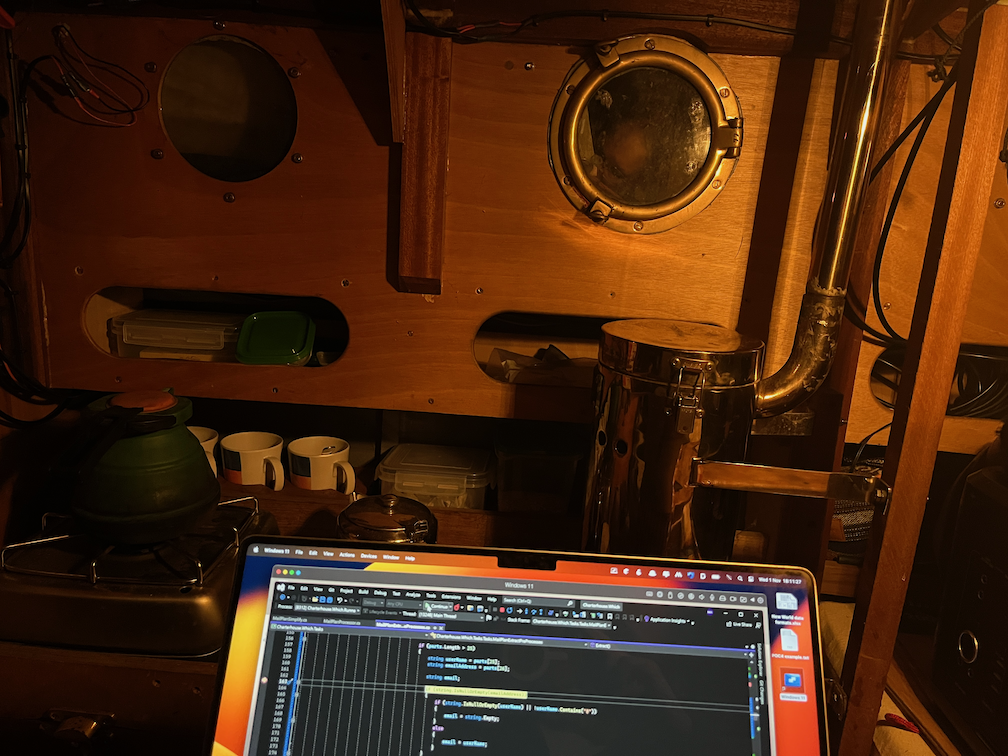
There is not a lot of space in the cabin to be able to take a decent photo, but you can see the top half of the laptop with the heater and portlight beyond. I was able to get a couple of hours work done before reaching a good place to stop.
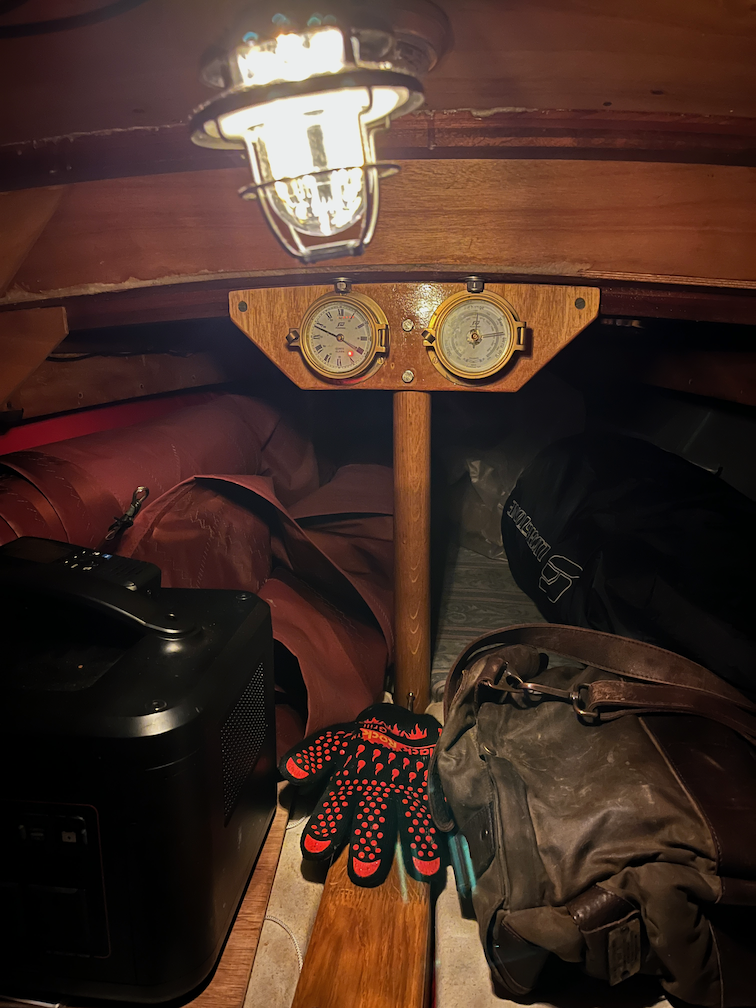
It was at this point that I realised that Naiad was leaning over as the wind had risen considerably, but because I did not have any visual references I did not notice until I put the laptop away and looked around the cabin to find the lantern hanging at a strange angle.
It is hanging down correctly, it is just the boat that is at an angle. I made myself a cup of tea and once I had drunk that I took a quick look around before lying down on the bunk, fully clothed, for a short sleep. I slept in hour long stretches, getting up and looking around between each nap.
I used the Reolink camera to record the conditions outside. This one is just after 11pm, it is raining sideways and the wind is starting to howl.
The next check was at 00:30 and not much had changed.
The wind was really picking up by this time and you can see how much the cabn is rocking in this short clip.
The wind was starting to get under the canvas and lifting the aft edge. Fortunately the cover is held on with bungee which absorbs the lifting and doesn't strain the canvas too much. I will have to replace the cover shortly, however, as I noticed when I left that it was starting to tear in places. I'll probably bring some canvas patches and sew them on just to keep it going through the Winter.
I kept on checking about every hour until 2am which was almost High Water and meant that we were no longer sheltered by Cobmarsh Island and were feeling the full force of the winds. All was still well at this point so I settled down for a longer nap this time and slept until 5am.
I had the choice to try and get ashore or to stick it out for another day since the forecast indicated that the winds would be much less on 3rd, but as you can see from the above clip, the conditions were not too bad at 06:23 and the rain had just stopped so I hurriedly pack the dinghy and lef the wind blow me ashore. Then it was just a case of driving back home avoiding the floods and fallen branches all along the route.
I was very happy with how well Naiad rode out the storm, and now that she is rigged for stormy weather I will not need to worry about her in the future.
2023.10.28 - New Cockpit Bottom Boards 1
Another task of the never-ending list of things that I need to do for Naiad is to sort out the issue of the cockpit bottom boards. The ones that have been in Naiad since I rebuild her are made from oak and do the job except that I made them flat and that is fine for the edge that rests on the keel but not good for the other edge which sits on the curved hull. The result is that after a few visits one or both of the boards crack along the grain due to my weight on the unsupported part of the board due to the hull's curvature.
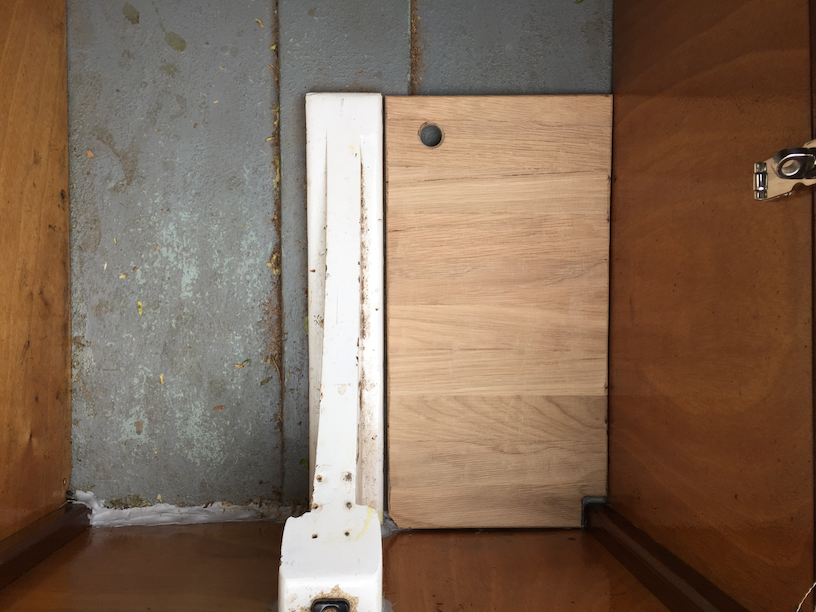
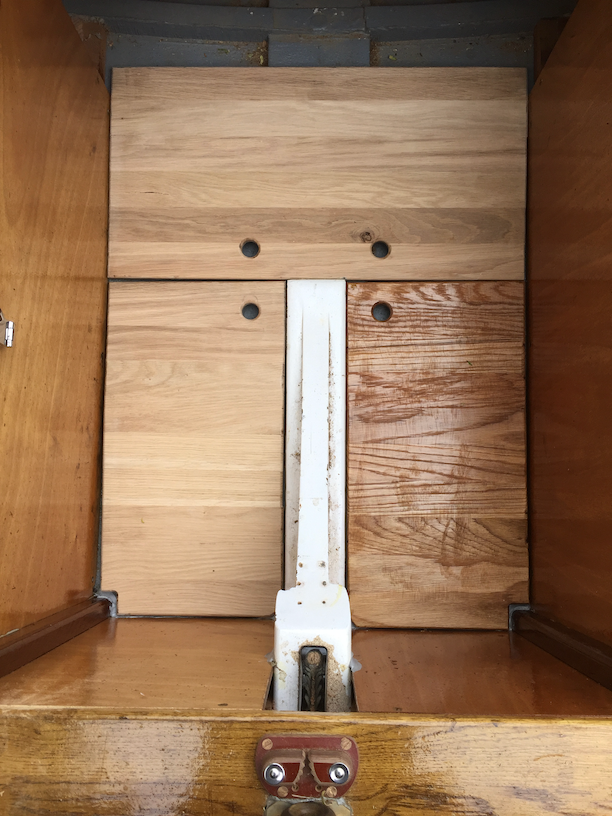
This is a photo of one of the bottom boards in the cockpit when I first made them. Looks quite nice. But what you cannot see is that the board right hand edge is unsupported just below where the silver latch is in the photo. Stand on that part and nothing will happen but step down from the thwart onto that part with all my weight coming down there hard, well the board snaps. The other side is the same.
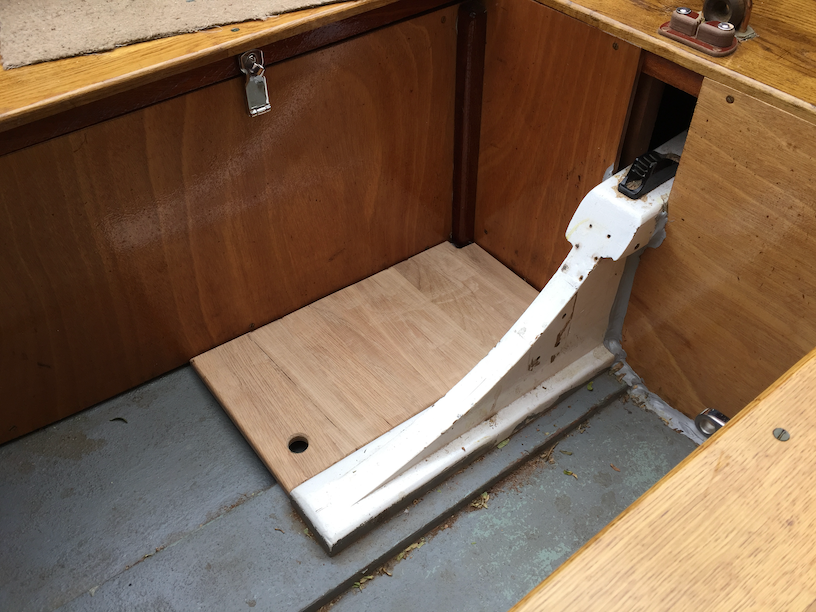
The board from a different angle.
Here are all three bottom boards in place before I took them out to be varnished.
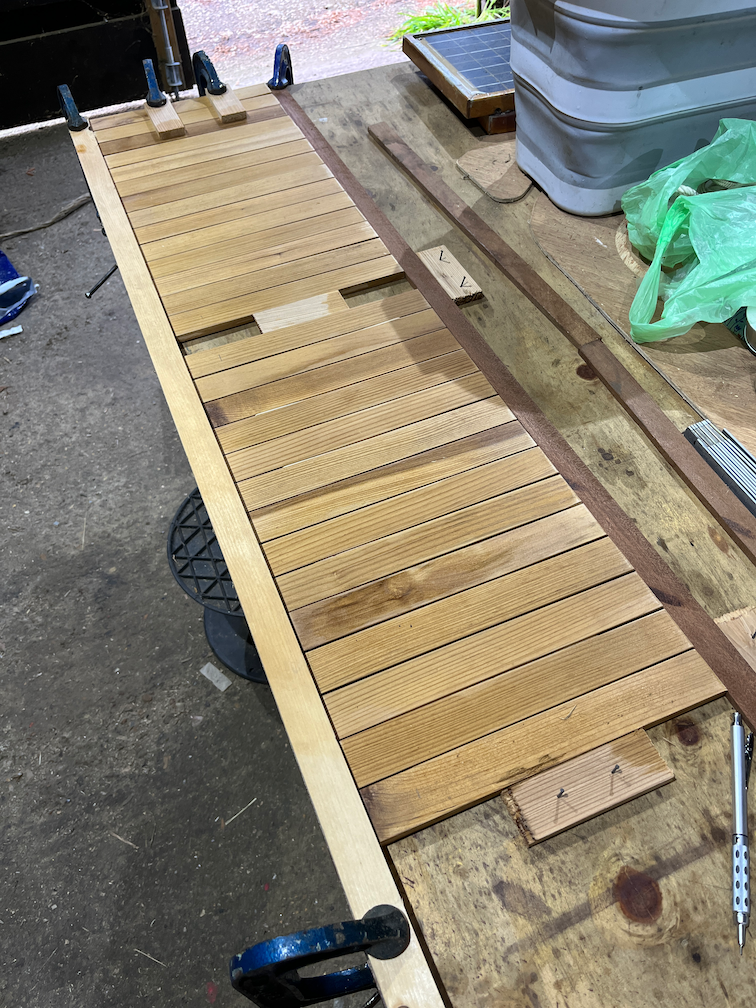
The new bottom boards are made of Red Cedar, mainly because I have a lot of it in the wood pile. The battens were cut to the correct width and length and clamped on all four sides using battens, cramps and offcuts nailed to the bench.
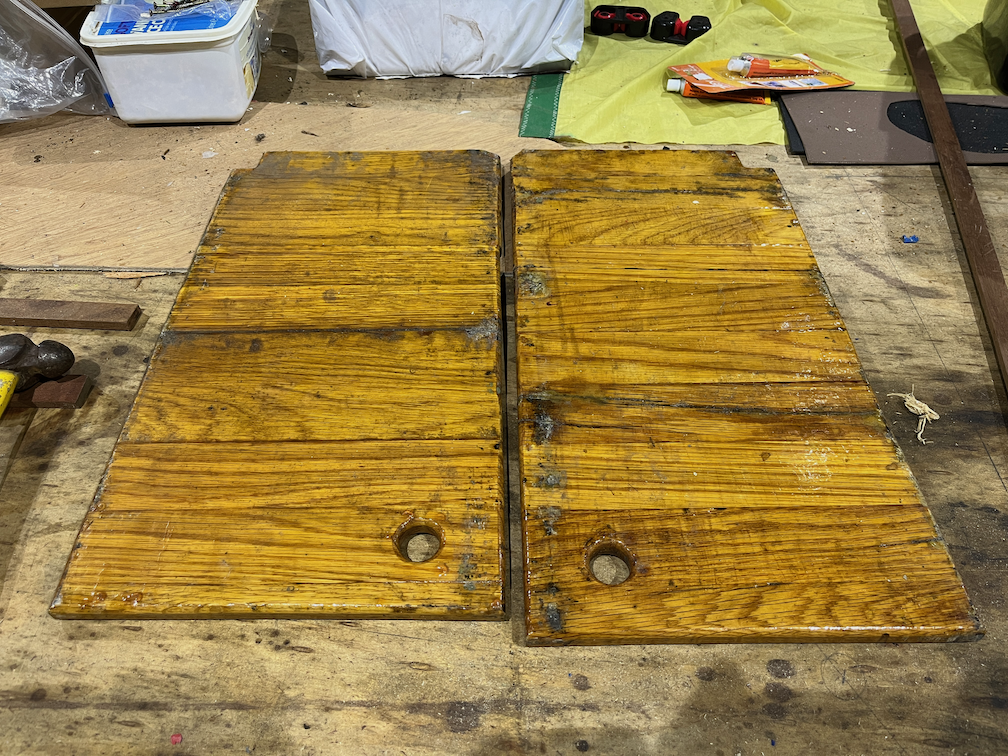
Thes are the two original boards. They have been repaired several times over the years.
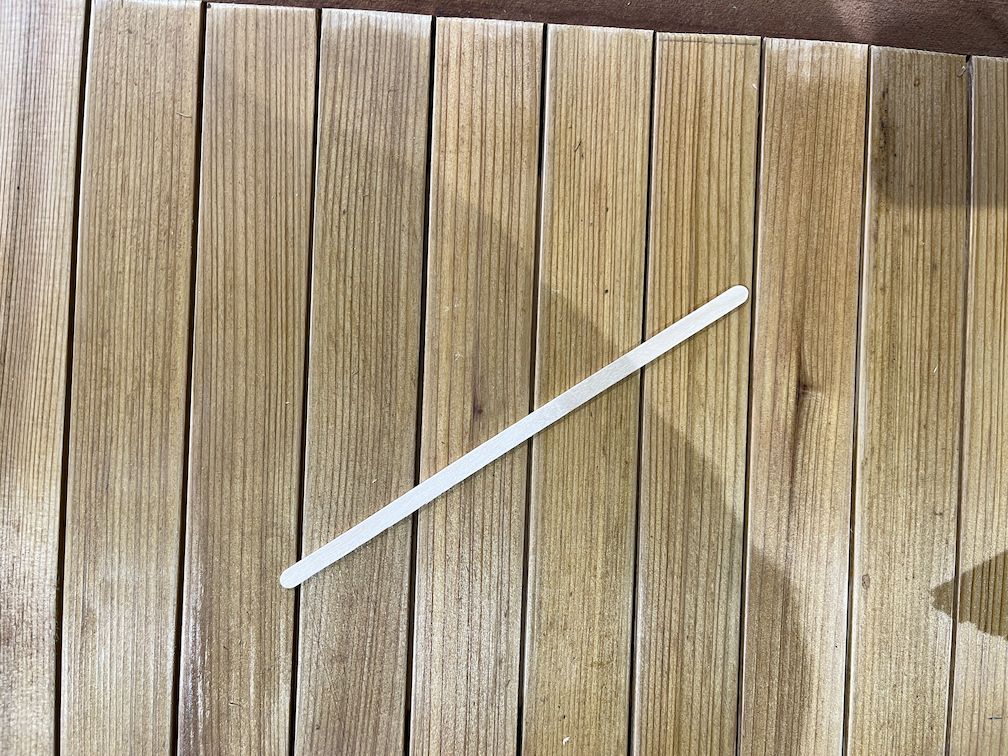
I put a thin sliver of wood between each of the battens. The wooden sliver is a mixing stick that I used for mixing epoxy. They are about 1.5mm thick which is exactly the right width for this job.
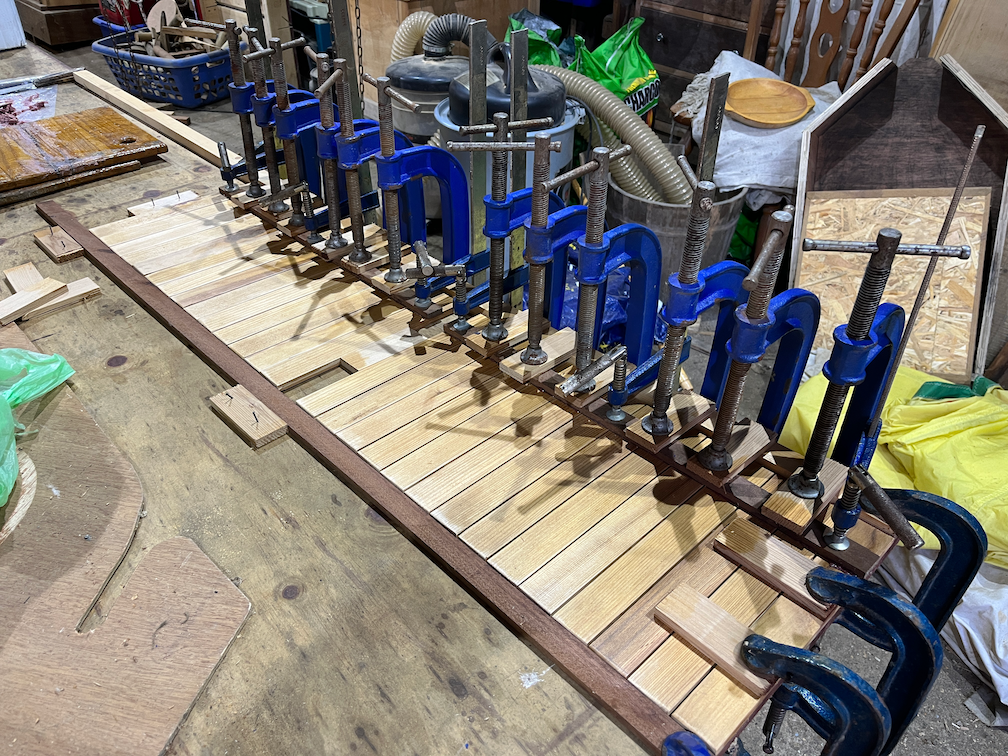
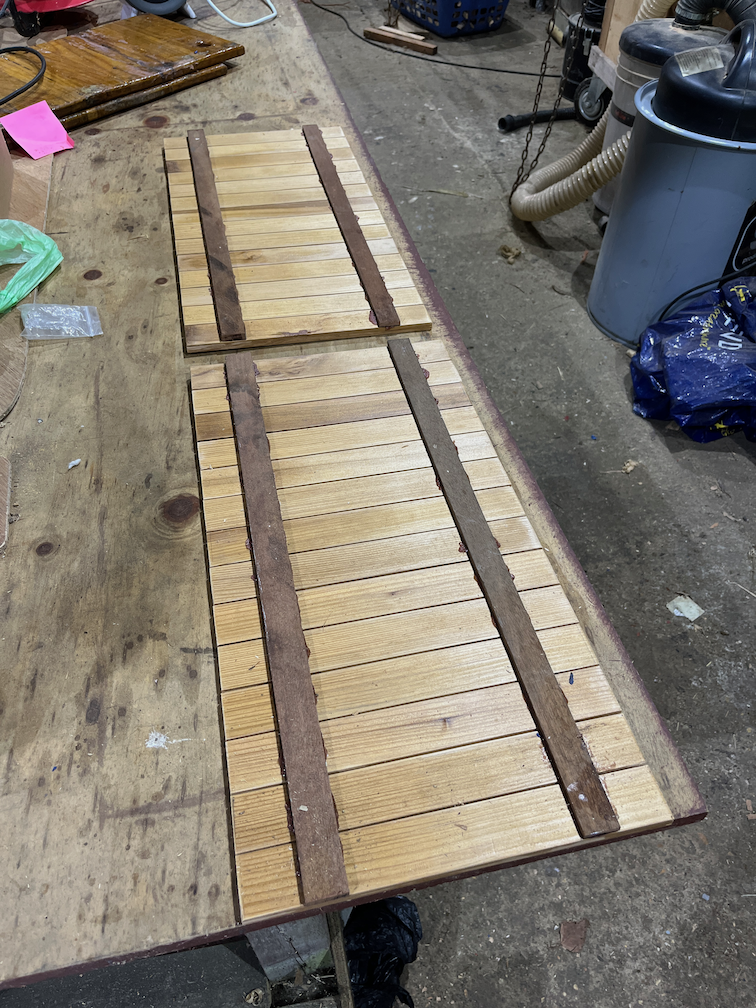
A length of Sapele was then glued to the battens using thickened epoxy and clamped in place using a few cramps. You can never have too many cramps.
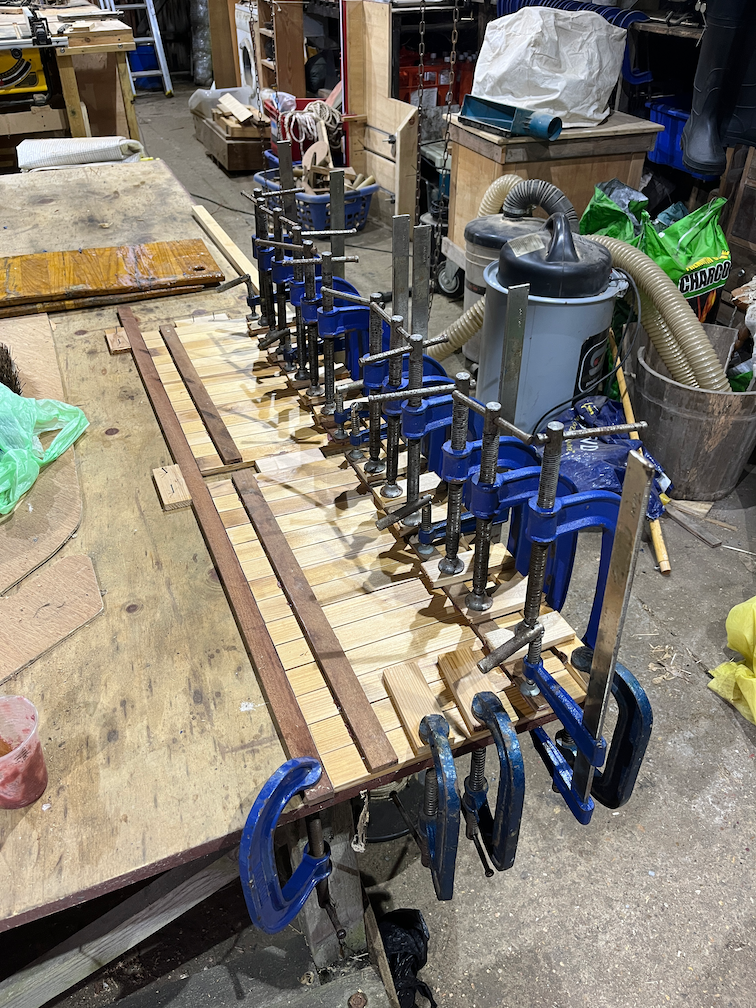
The following morning the cramps were removed, the boards turned around by 180º and another, thinner length of Sapele glued to the other side. Again a few cramps used to hold it down firmly. This thinner batten will be on the outer side of the board.
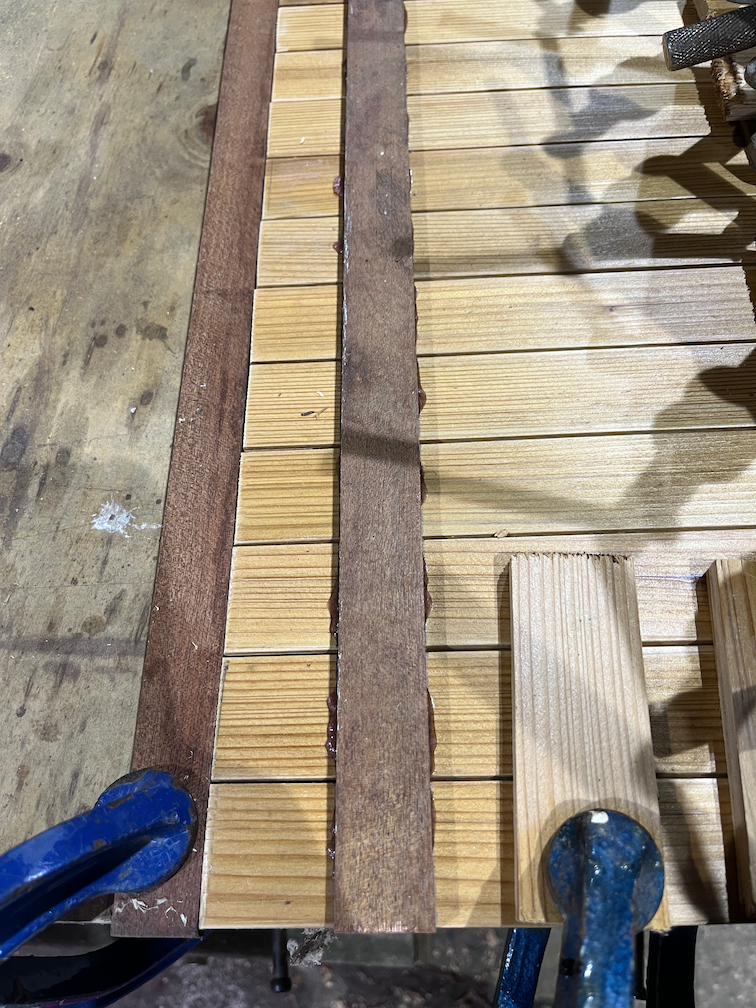
A close up of the first length of Sapele shows that some of the epoxy has squeezed out of the joint, but not excessively.
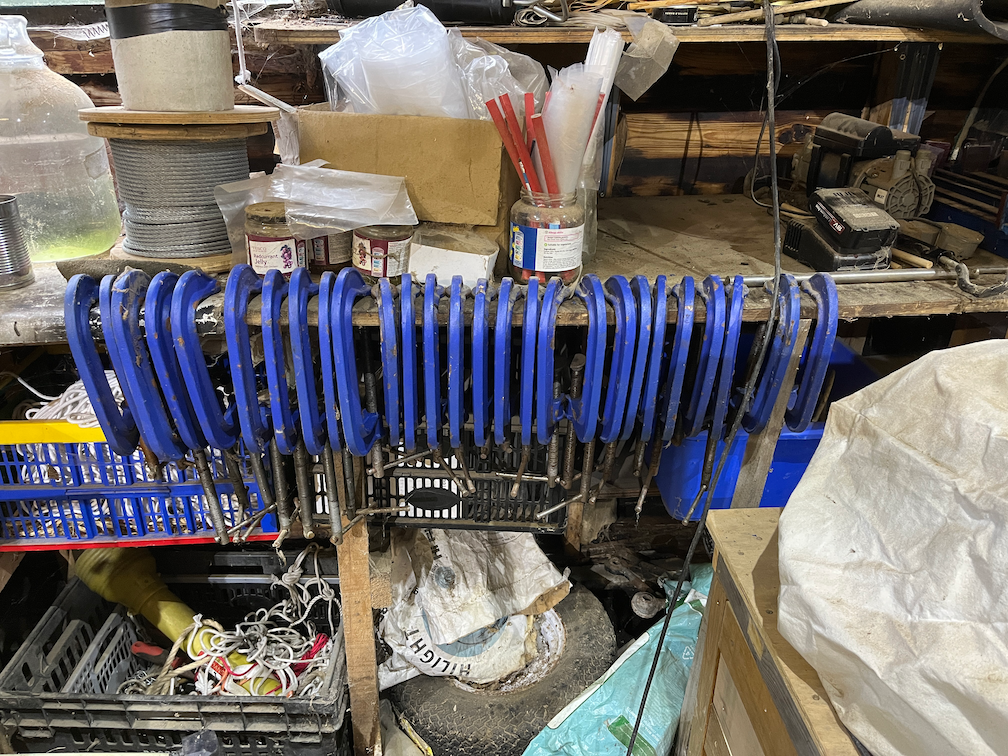
While I was about it I took the opportunity to put some WD40 on the threads of all my large cramps, all 40 of them. Did I mention that you can never have too many cramps?
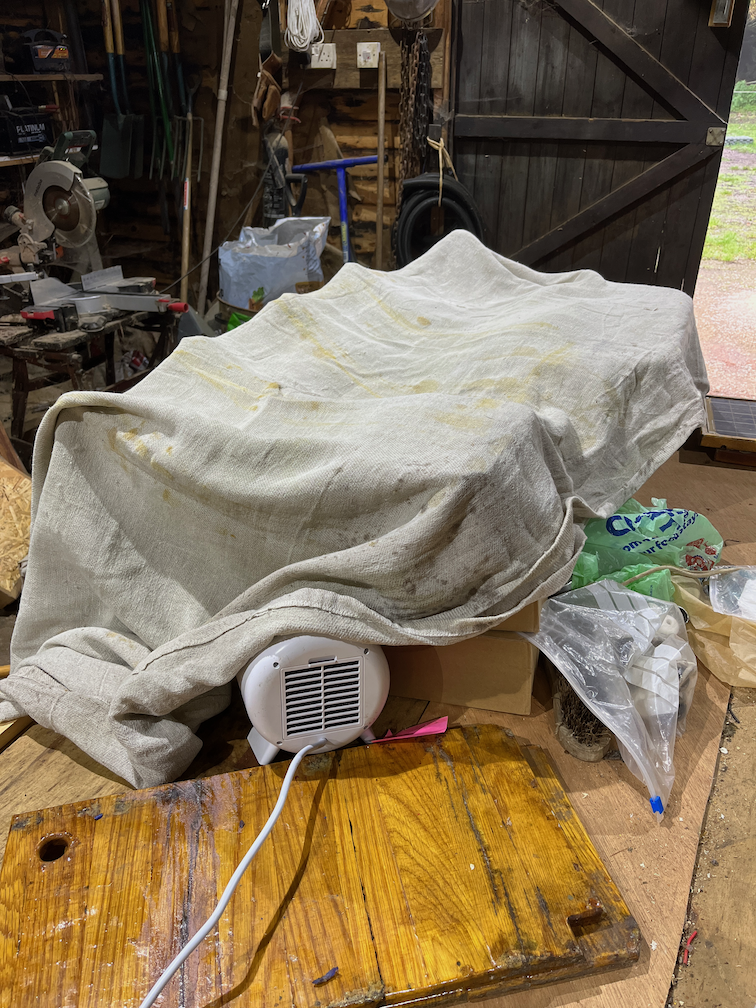
The temperature in the workshop this morning was a little too low for curing the epoxy so I covered the assembly with a drop cloth and used a small electric heater to blow hot air into the space under the cloth. The heater was left on high for about an hour which warmed the assembly and the bench beneath it after which I turned the heater down to low, just to maintain the warmth under the cloth. Hopefully this will allow the epoxy to cure in a few hours.
The idea behind the new boards is to allow them to flex a little so that when I step on the unsupported part, instead of cracking the board gives a little. That is why the battens are spaced apart and not joined together along their sides. The long Sapele batten underneath will flex but the grain on those runs fore and aft with respect to the boat and should not crack.
Now you may ask why am I not making a curved batten underneath the boards so that they are supported along their whole length. I would if that were an easy task, but it is not. If you look again at the three photos at the top of the page you will see that the locker sides prevent me from seeing just where the gap is and by how much I would need to brace the boards. So, for now, these flexible boards will be the answer. Once I figure out how to make a suitable curved brace then I will do that as well.
For now, time for a cup of coffee.
After a few hours in the warmth the epoxy had cured sufficiently for me to remove the cramps and take the boards into the house where they spend the next few hours on top of the Rayburn staying warm. That should cure the epoxy fully.
With the cramps and restraining blocks removes the new bottom boards look pretty good.
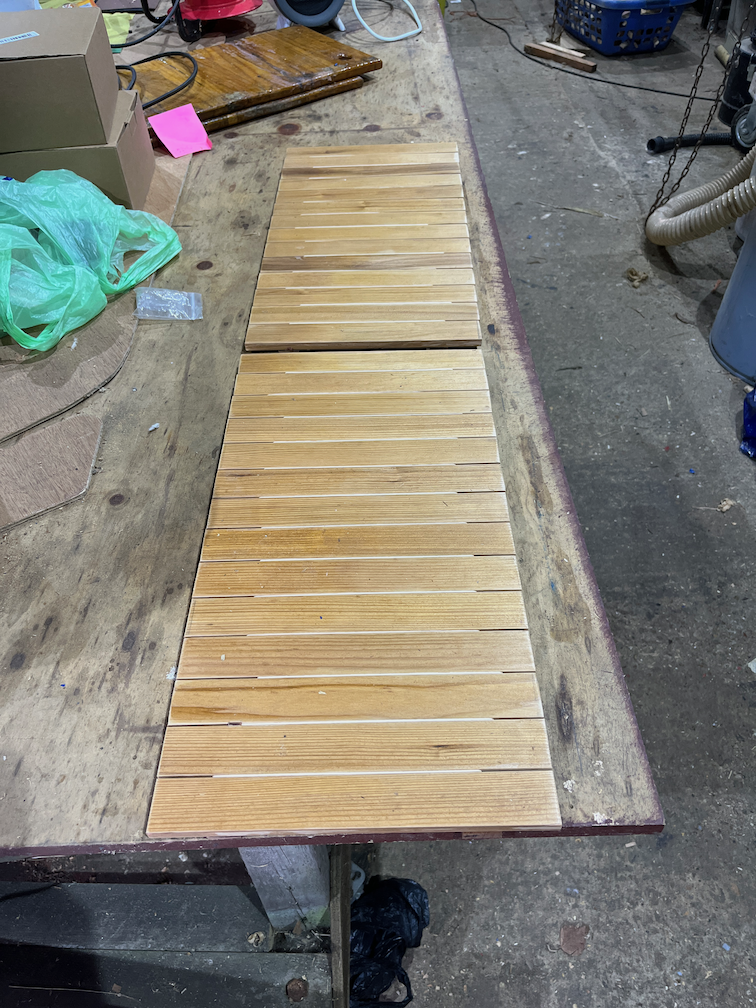
The top sides of the boards are also good and here you can see the spacers between the battens.
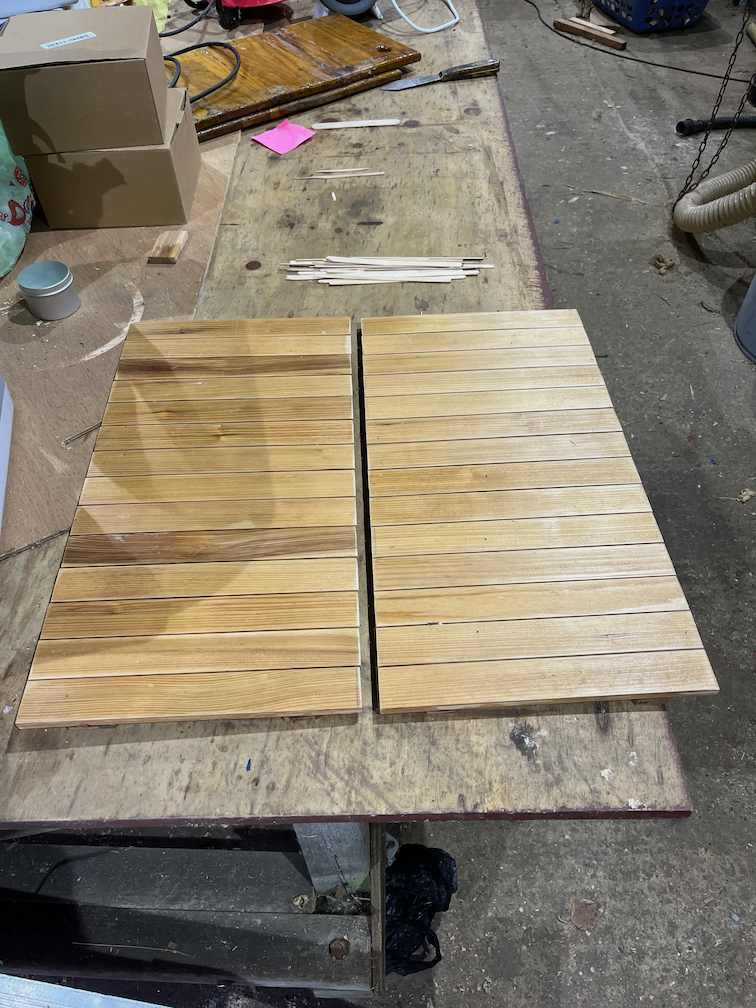
With the spacers removed the boards look very good and flex a little when pressure is applied to the middle of the board, so that looks like it has been a success.
Next up will be to make the finger holes, cut off one corner to fit around an epoxy fillet in the cockpit, round off a few corners and to taper the aft edge of the thinner batten on the underside. But that's for another day and after that it will be time to apply some varnish. With the weather forecast to become quite cold in the next few days, the varnish work will be done in the work room inside in the warm.
Time for a cup of tea.
2023.10.26 - Self-Steering Tiller Guide Mk3, Part VI
The various parts of the tiller guide have been sitting in the kitchen keeping warm so that the last coat of varnish cured nice and hard. It is not a perfect finish and never will be for two reasons. Firstly, the varnishing is carried out in the workshop which is full of dust and various small flying insects. I could try to rig up and paint booth but that is far too much hassle. Secondly, the finish will only stay perfect if it is not handled in any way and locked up in a cabinet somewhere. This is going to be used so there is no need for it to be perfect.
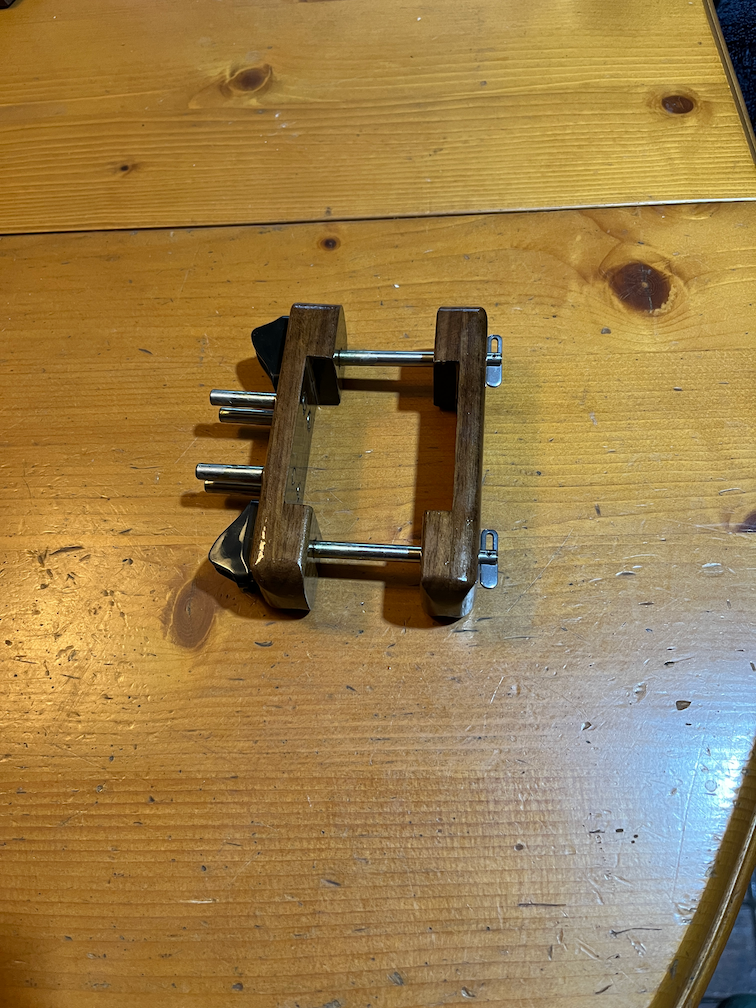
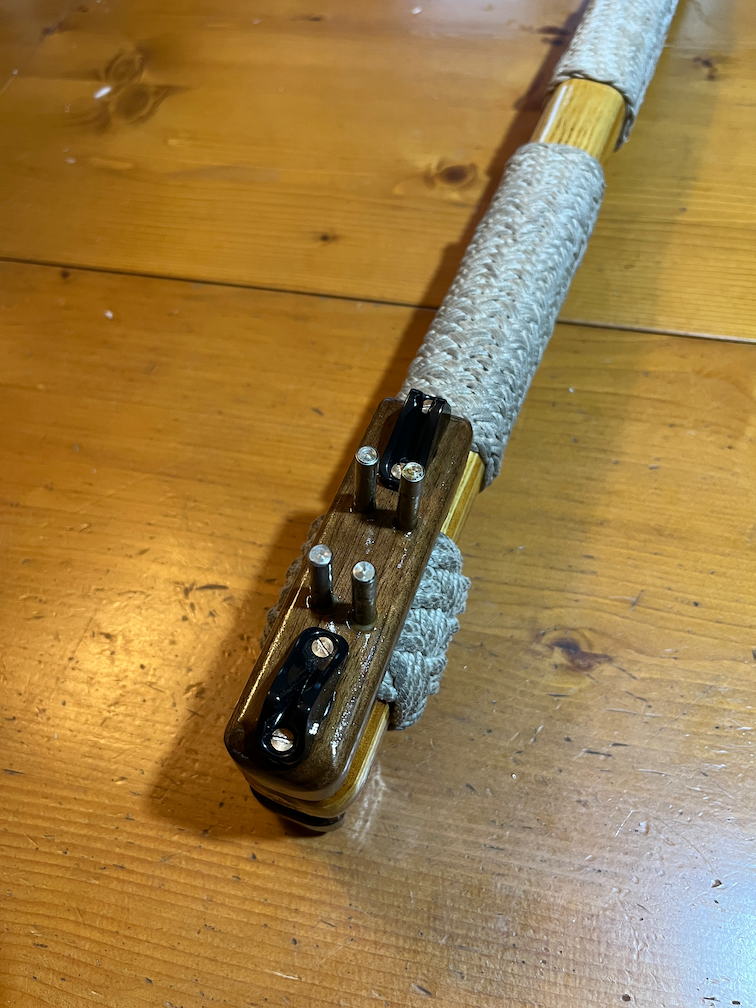
Here is the completed guide with the cleats screwed in place.
The resulting guide is fairly neat and fits onto the tiller easily and is not too obvious or obnoxious.
Now I need to wait until the weather is good enough to use it.
Time for a cup of tea.
2023.10.25 - Self-Steering Tiller Guide Mk3, Part V
I am getting close to finishing the tiller guide, the last few days have been dealing with the epoxy and varnish coatings that will preserve it from weathering and also make it look nice. Since I was working with varnish I also took the opportunity to re-mark the sounding cane.
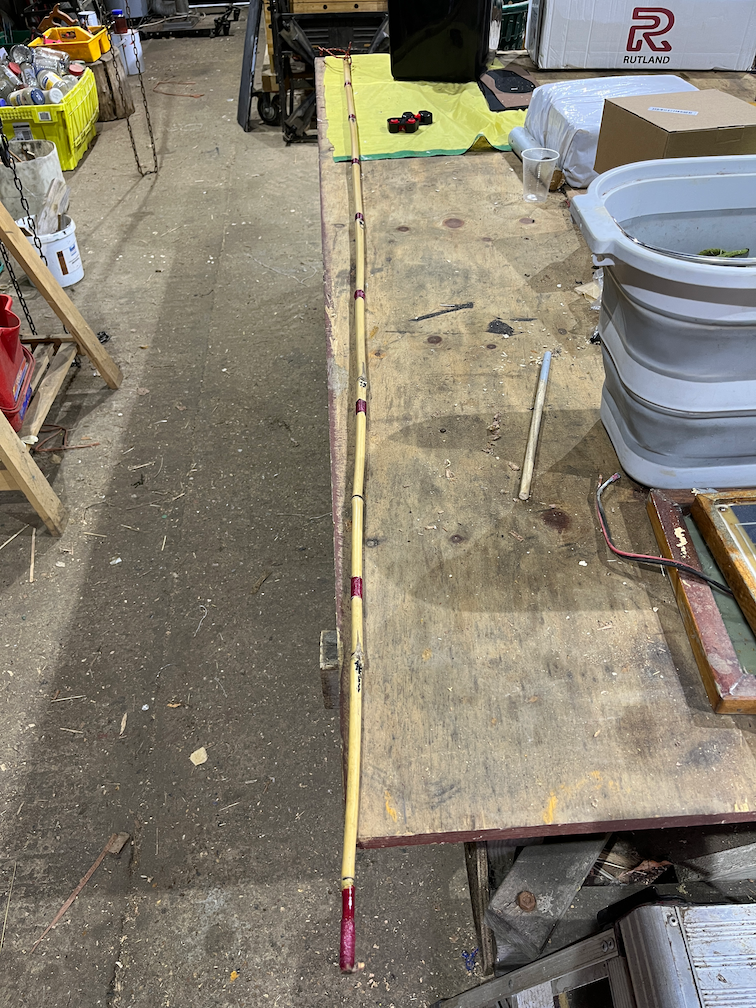
The self-amalgamating tape that I had used to mark the cane does not seem to like the salt water and I found that the marking had come off the last time I visited, so I brought the cane home and marked it with whipping twine and paint.
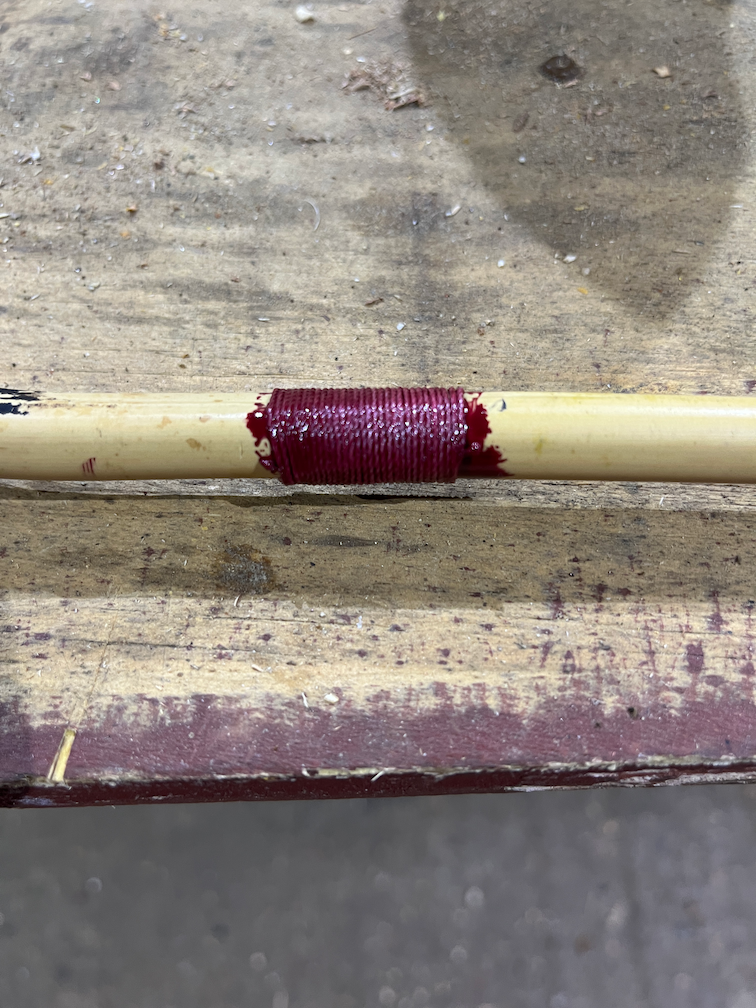
A close up show one of the marks in a little more detail. I didn't bother taping the cane to prevent the paint from getting on to the cane, as you can see, since this is not a pretty item and the paint will wear off soon enough, I expect. The paint is just there to make the marks stand out.
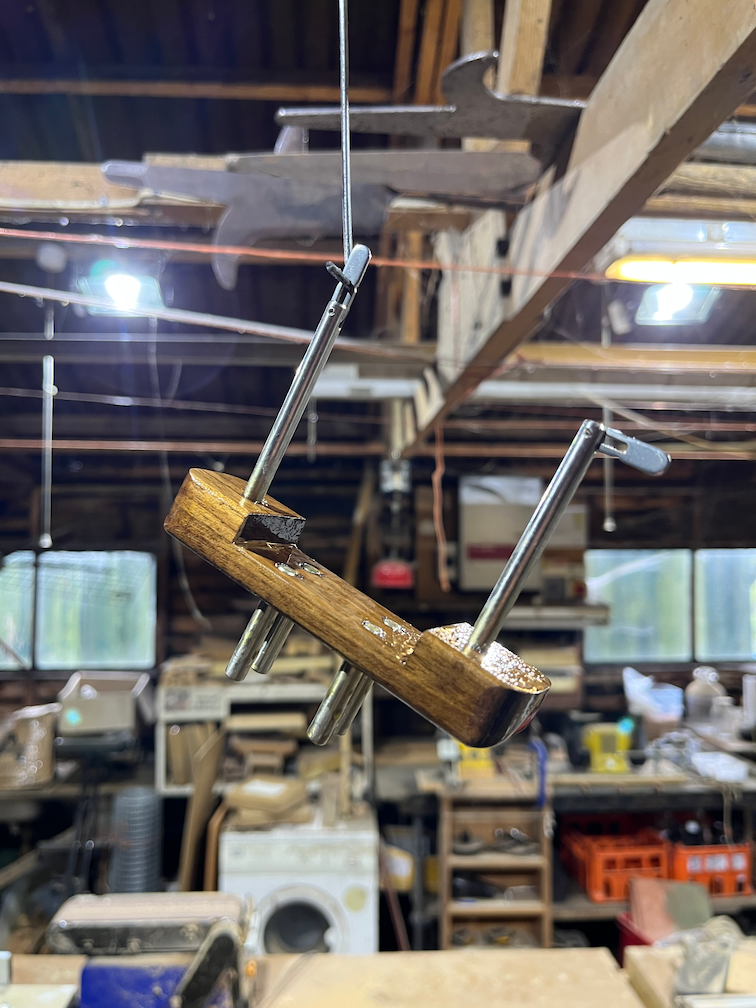
Back to the tiller guide, the wood has been soaked with penetrating epoxy and allowed to cure inside the house in the warm for three days, then three coats of varnish were applied, the second of which was given a light sanding before the final coat was applied.
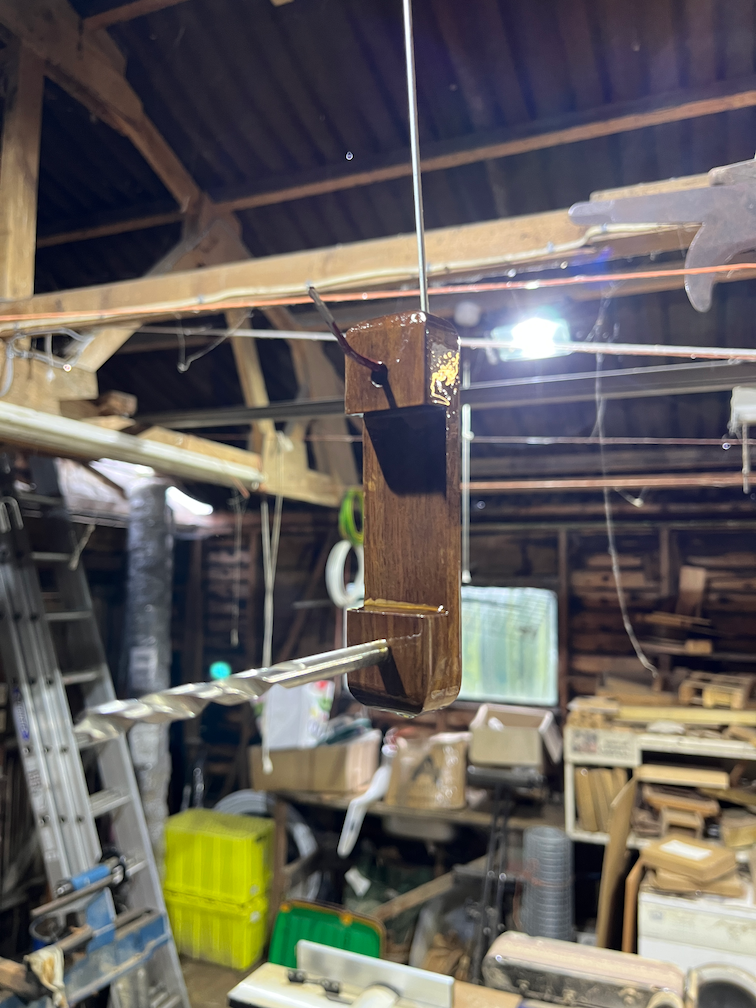
I let them hang in the workshop, which is cold at the moment, to allow any excess varnish to 'drain' down to one end and then use a brush to remove the drip. Both parts were then taken up to the house where they are hung over the Rayburn so that they warm up and the varnish cures more quickly than in the workshop.

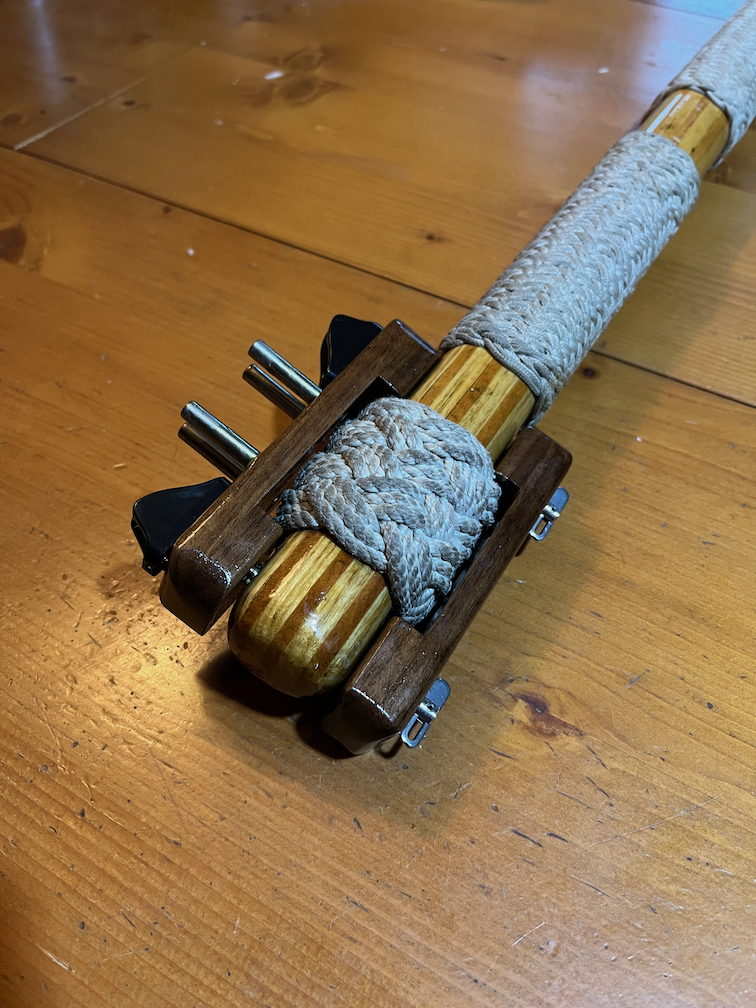
The decorative rope taken off the tiller a few days ago was replaced after the second coat of varnish had cured sufficiently that replacing the rope would not damage the new varnish.
Time for a cup of tea.