2022.12.29 - Cold Hands & Power Tools Don't Mix
Annoyingly the weather turned very cold after the last post and work on Naiad had to stop. Sub-zero temperatures and I do not like each other much.
However, Tina was able to salvage a large set of metal shelves when her Vaccination Centre closed down and we made a start on sorting out the wood pile to allow the boat to be moved into the workshop.
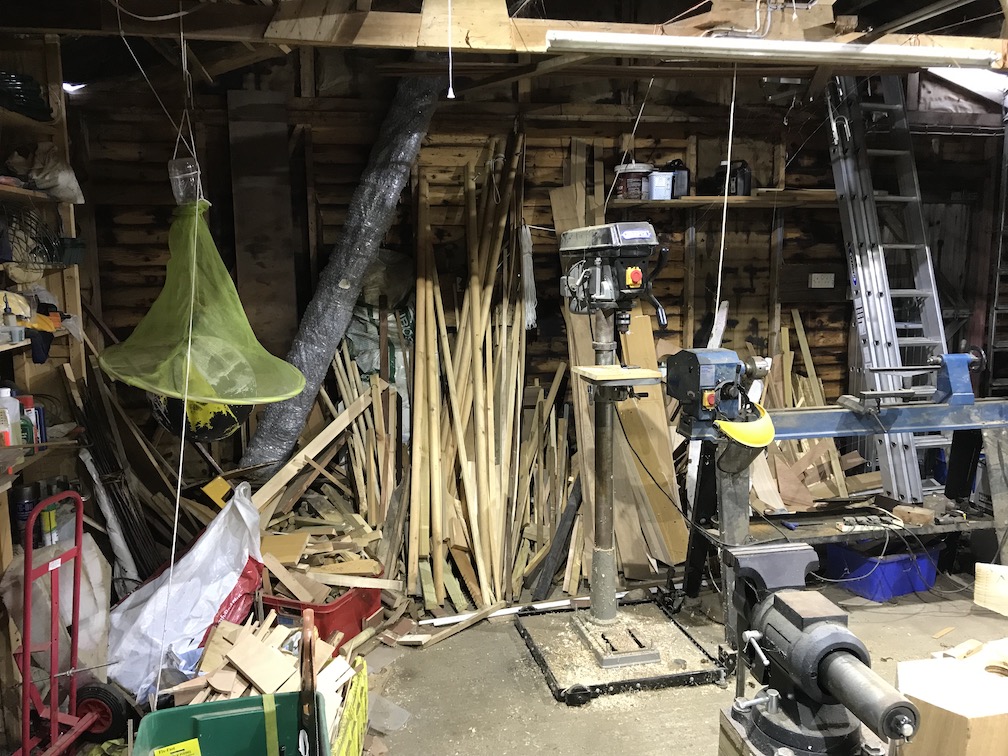
This is the wood pile before we started. The work table has been moved as far forward as possible at this point.
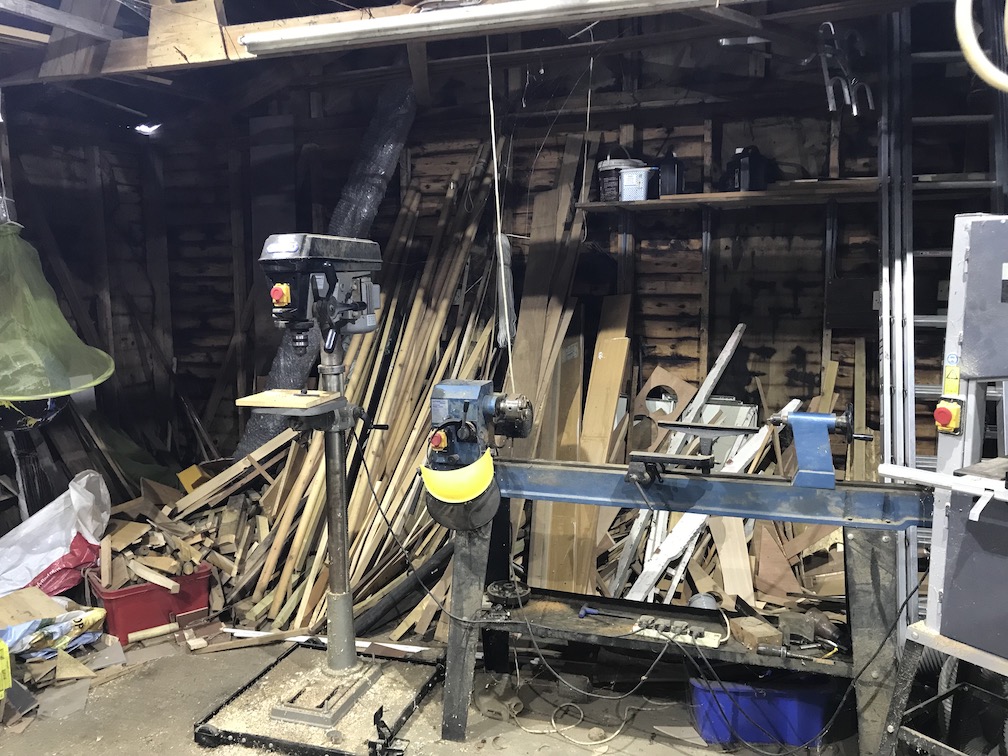
As you can see, it is a total mess.
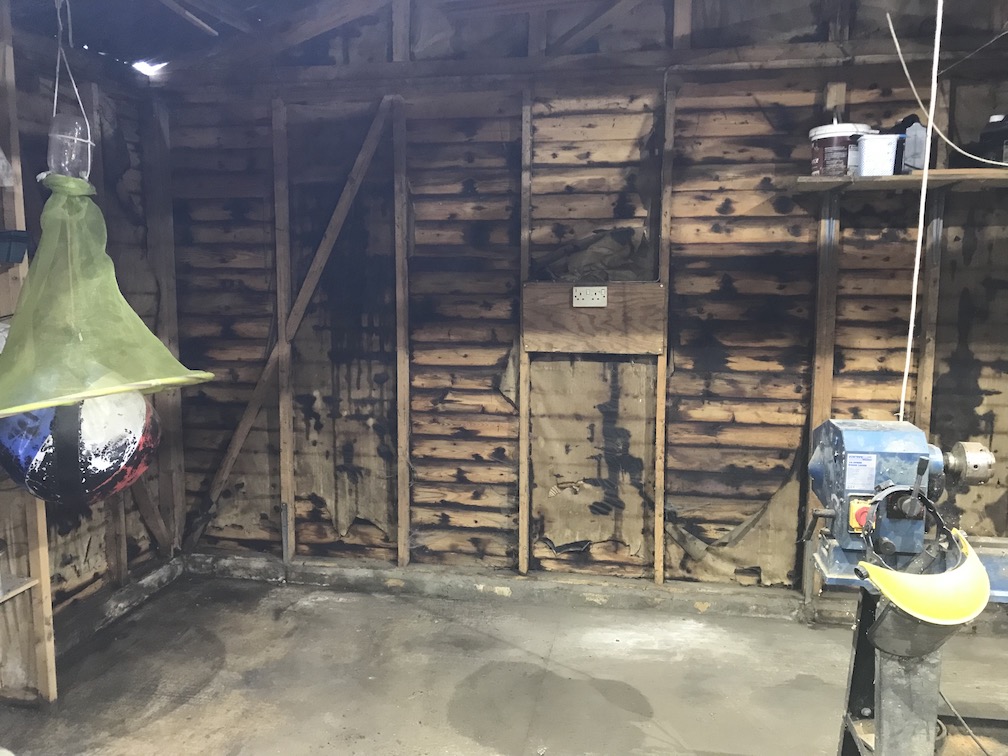
With the wood taken out of the heap the back area looks a lot better. The mouse nests and plum stones have been swept up and the majority of the wood piled on the floor where the work table used to be.
It is still very dark over in that corner as I haven't installed the lights in that area yet.
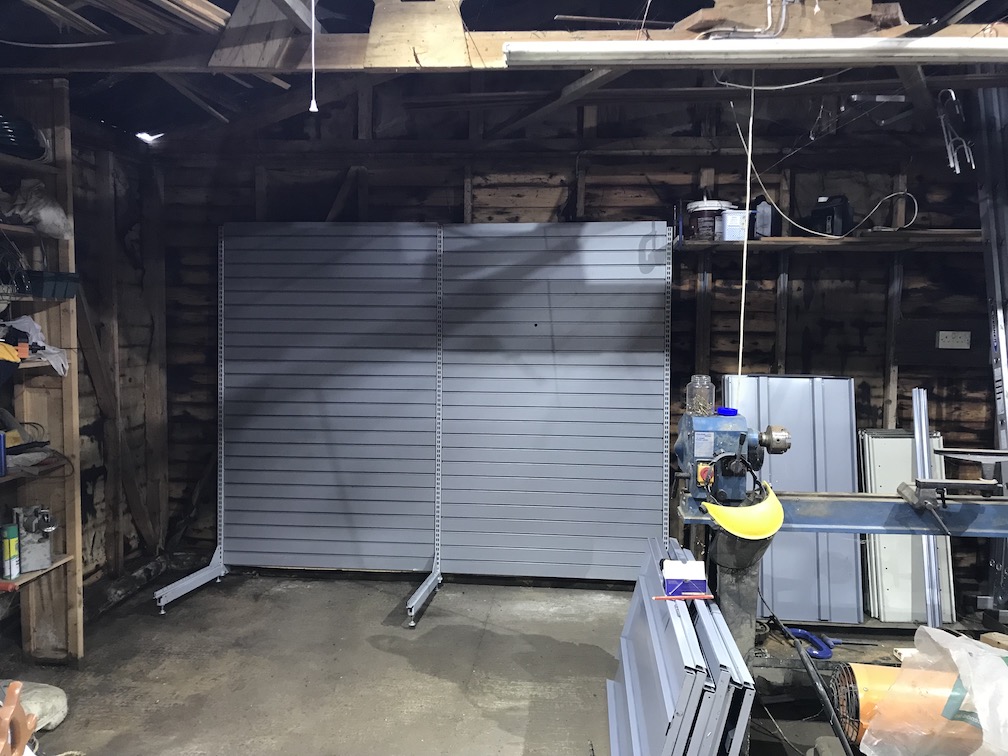
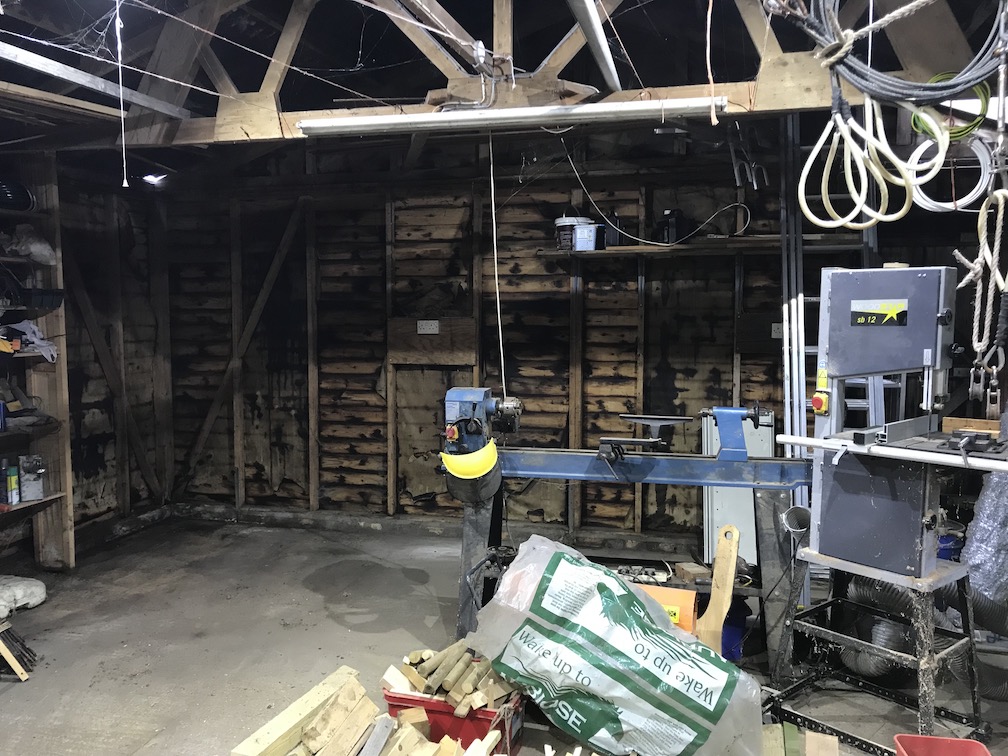
The shelves fit fairly well into the space but we had to stop at this point for two reasons. Firstly, we are missing five shelf supports and I have to buy some replacements and secondly, there are two fairly significant leaks in the roof over that corner which will need to be dealt with or the wood is just going to get wet and mouldy. The back board of the shelf unit is not structural, just particle board, and will fall apart if it gets wet as the glue is not waterproof.
So, I made a start the day before yesterday on the rocket stove which required the use of an angle grinder with a metal cutting blade to cut the flue down to size and due to the low temperatures and resultant cold hands I slipped with the grinder and took a chunk out of my left thumb !!!
Not badly but if I had gone to A&E I dare say that a couple of stitches would have been put in. After cleaning the wound I used a couple of Steri-Strips to close the cut, covered the cut with some antiseptic cream and then put a dressing over that.
The trouble is that I can't really use the left hand for much as I have no strength in the thumb right now so work of all sorts has come to a complete halt.
Unfortunately, the list isn't getting shorter at this point.
- Fix the two roof leaks
- Mount the shelves
- Sort and stack the wood
- Cut the burn pile into pieces small enough to put in the rocket heater
- Put the work table back as far as possible whilst still leaving enough room to get past it
- Clear the sides of the workshop
After this is all done the boat can be wheeled into the workshop so that the repairs to the transom can be carried out and then the rest of the work.
Time for a cup of tea.
2022.12.09 - Frozen Fingers
With the temperature around zero and first thing in the morning below zero, not much work has been done on Naiad. Trying to do anything without gloves means that you have to stop every 30 minutes or so and go back in the house to allow your fingers to warm up as working with gloves on is a recipe for disaster. It's just as well that Naiad is about ready to go into the workshop.
Still, one or two things have been done.
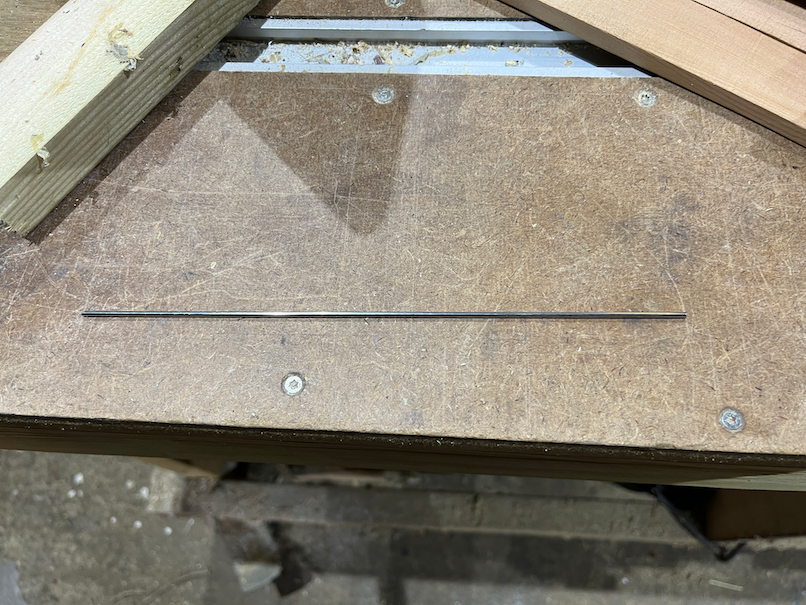
One of the things that needed to be tweaked is the rudder blade downhaul. If the line is allowed to go slack then it can get jammed between the blade and the stock which makes it difficult or impossible to lift the rudder blade. Once or twice I have needed to lift the entire rudder off the pintles due to the blade being stuck in the down position. The solution is easy. Take a length of 2mm stainless round rod.
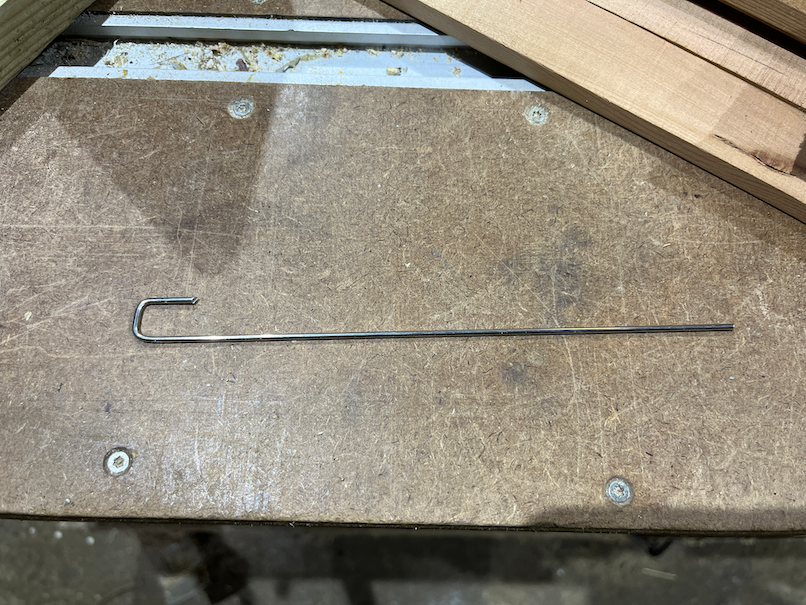
Bend the end as shown.
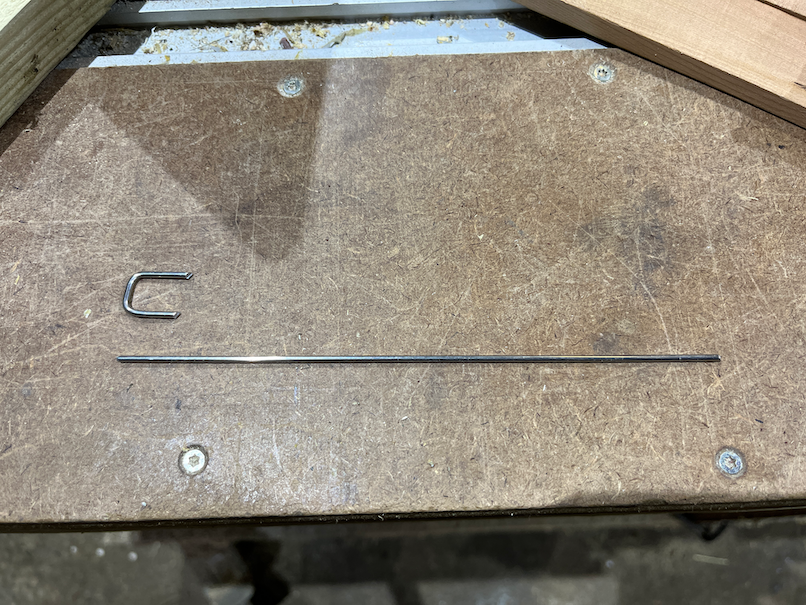
And cut off the bent end to form a fencing staple, sort of, and repeat three times.
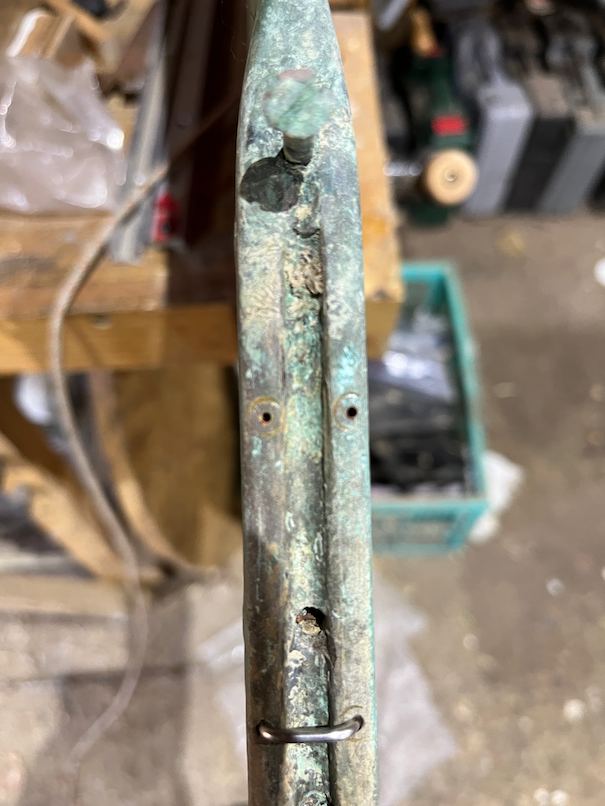
Drill two 1.5mm holes in the rudder blade and gently hammer in the staple over the groove along which the downhaul should lie. When it's not being jammed, that it.
The last of these staples broke through the side of the blade due to my drilling in the pilot hole at an angle instead of straight down.
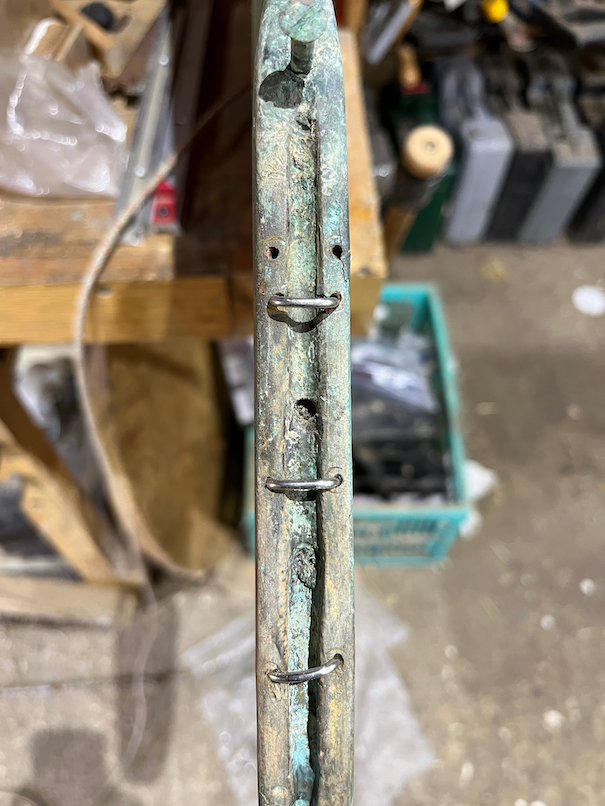
So, two new holes and the staple went in correctly. The incorrect holes will be filled with epoxy later.
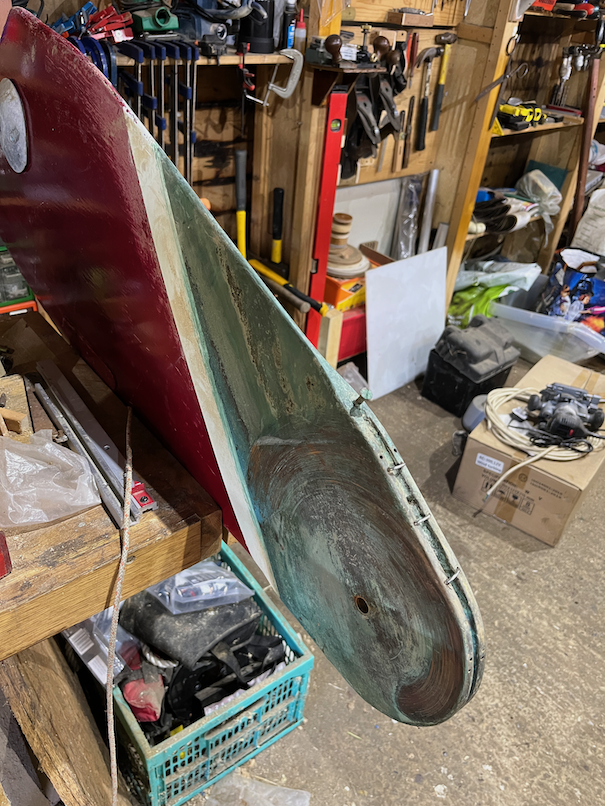
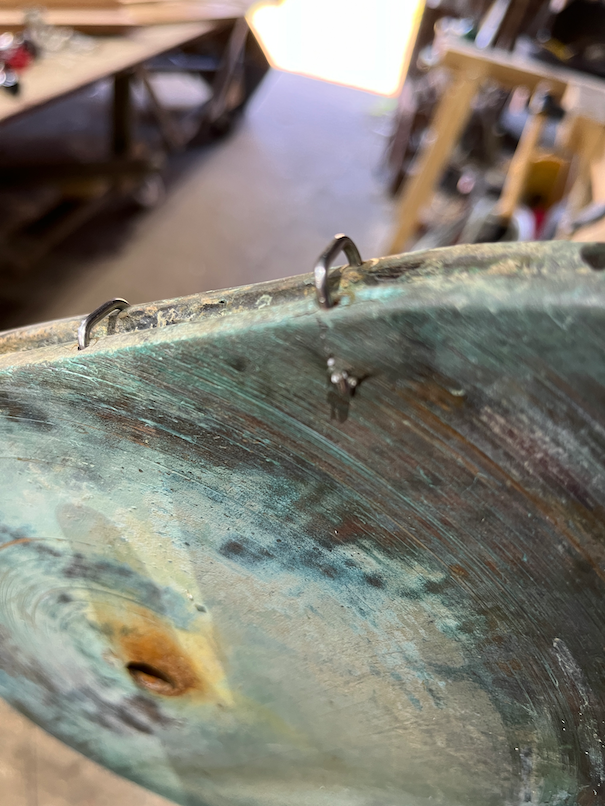
This is the result.
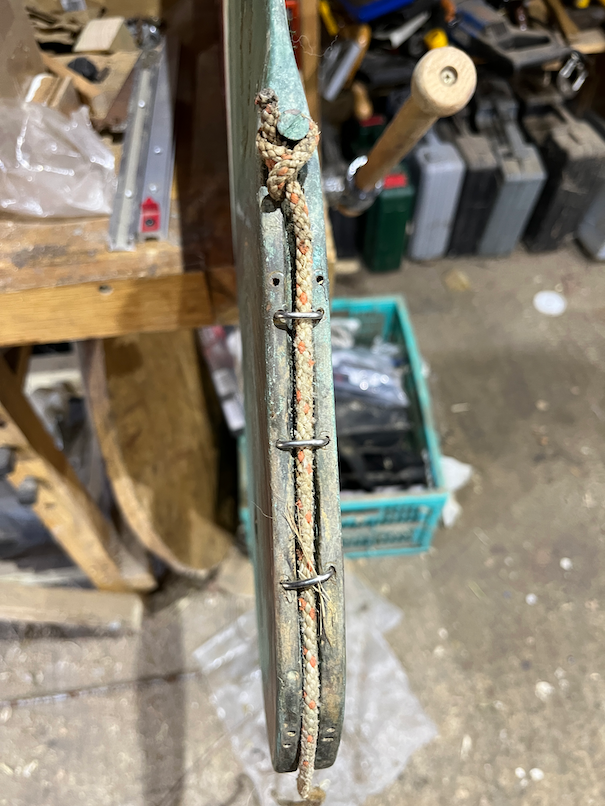
The down haul ties to the screw in the blade and runs under the staples. This should prevent it from getting jammed.
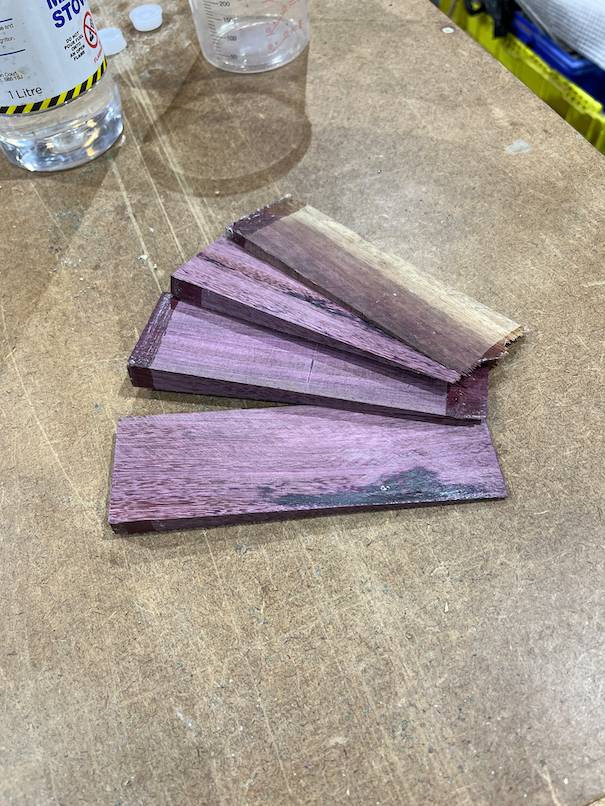
I cut several wedge shapes out of the Purple Heart I purchased.
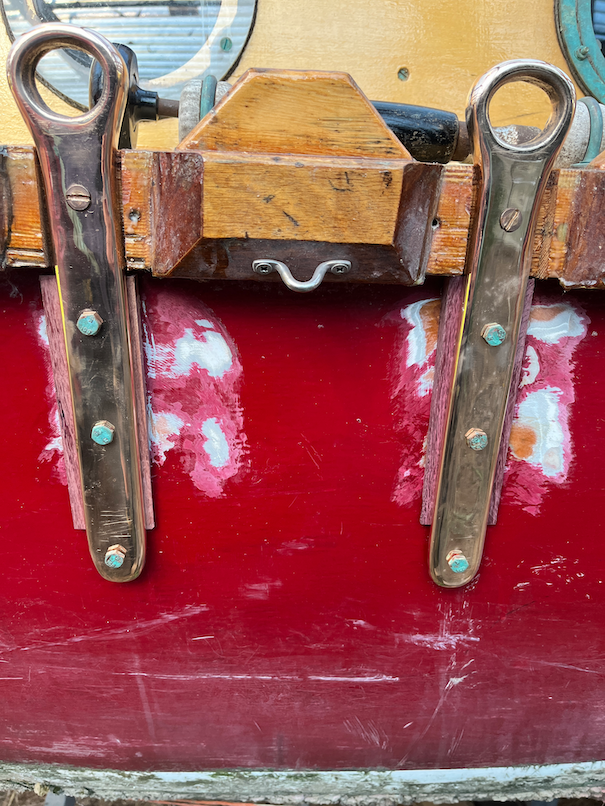
These fit under the new chain plates as shown and will be loosely attached to the hull and plates with a sealant, probably Butyl Tape. The chain plates on the port side could be fitted and fixed in places but I think I'll wait until Naiad comes back out of the workshop and do them then as I want to sand back the paint where the chain plates lay in the hull and put some epoxy on any bare wood there and that will be easier with Naiad upside down.
The rudder blade was taken into the house to warm up since it will be epoxied the next time I mix up a batch. I really need to find a way to heat the workshop, or at least Naiad when she is in there so that the epoxy work I'll be doing will get a chance to cure properly.
2022.12.07 - Epoxy and the Cold
One of the disadvantages of working on a boat during the Winter season is that it is cold. This has two main effects. Firstly, your hands and fingers get cold making it troublesome to use sharp tools possibly leading to blood loss and secondly, paints, varnishes, glues and epoxies take long to dry/cure. Much longer.
I have a 20kW workshop heater that runs on diesel that does a fairly good job of heating up the workshop but the cold weather does a pretty good job of cooling the workshop down again once the heater is turned off. Besides which, Naiad is outside at the moment. So, I lit the charcoal heater in the cabin for a few hours and also set up the small electric heater to blow warm air on the stem from the inside before I tried to do the epoxy work on the stem.

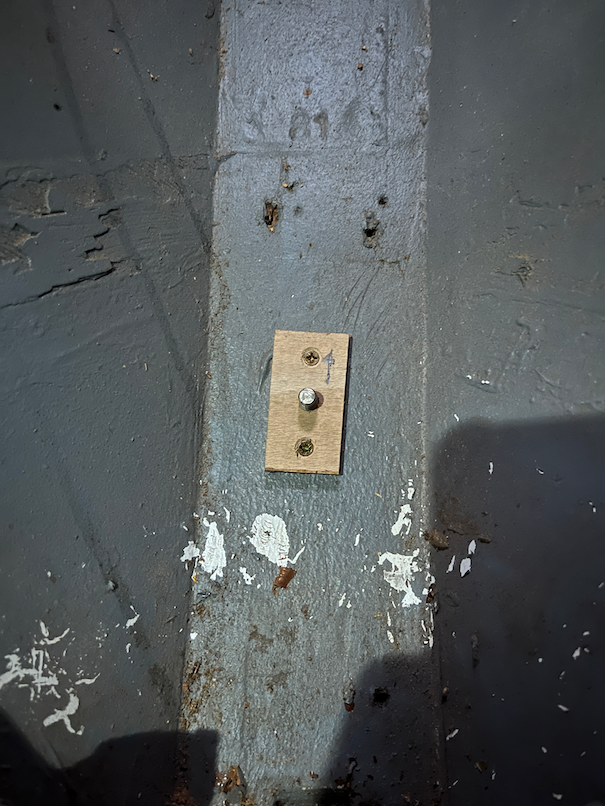
Having screwed the wooden locating pad on the outside of the stem I used a commercial piping bag to put the epoxy into the hole from the inside. I bought a roll of the piping bags from a catering supplies company a few years ago. Before piping in the epoxy I made a small hole in the plastic sheet that I placed between the wood pad and the stem. Once the hole was almost full of epoxy I screwed the inner pad in place and pushed an 8mm brass rod through the stem from the inside.
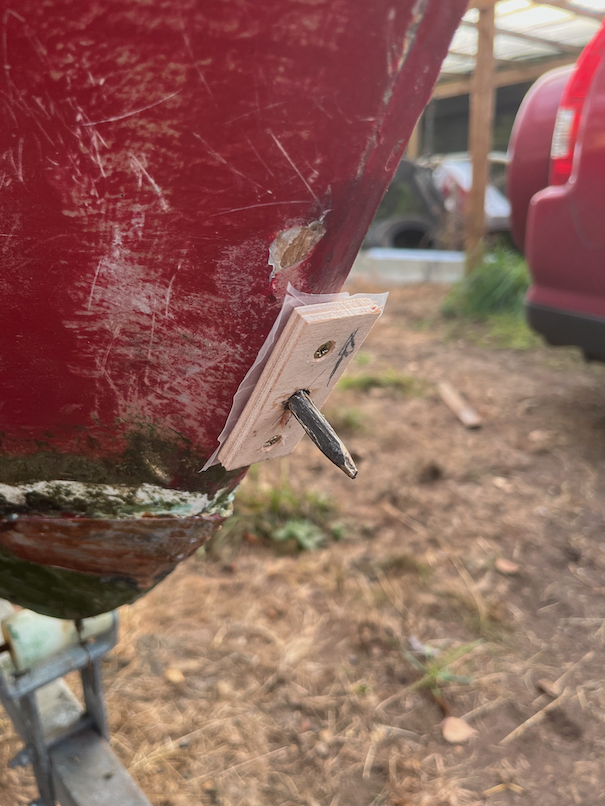
This is the result from the outside and you can clearly see the plastic sheet.
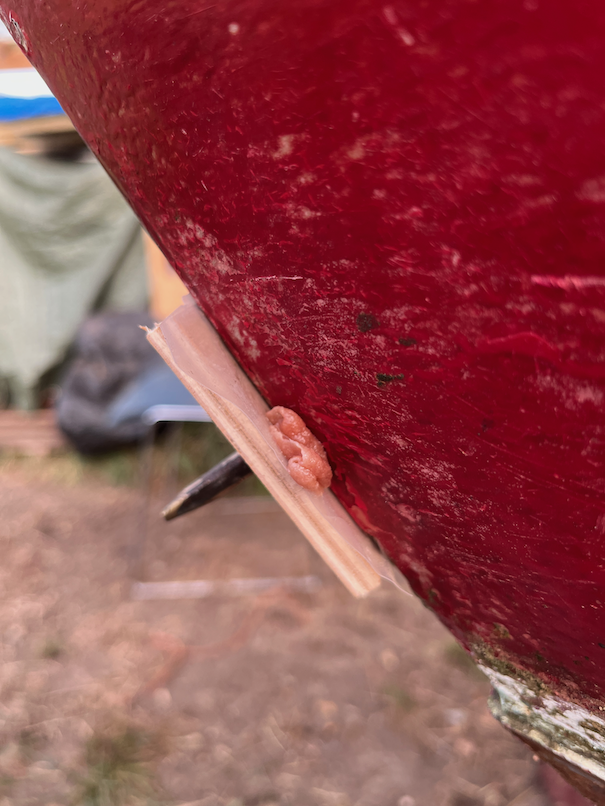
There was some squeeze out most of which fell on the ground but some oozed out of the side.
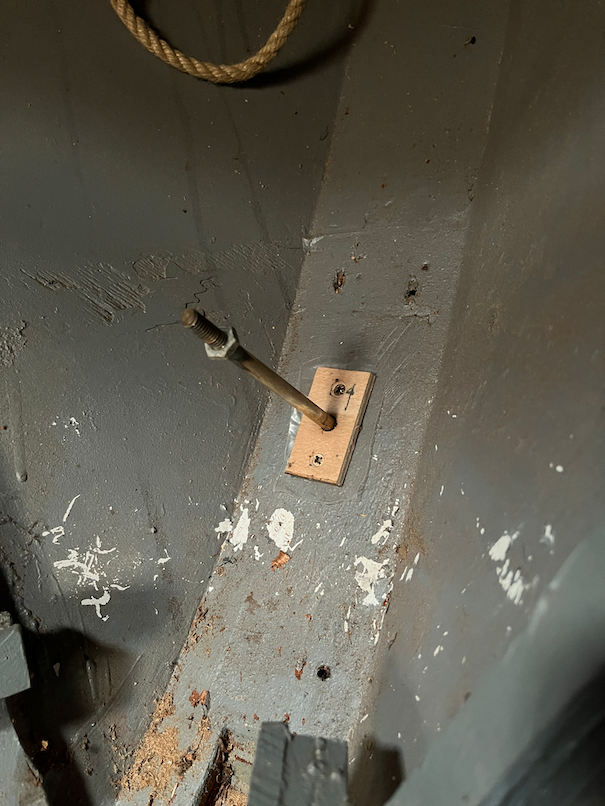
This is the view from the inside. Having done this I left the whole thing over night to start curing. I didn't leave the electric heater on but the charcoal heater burned for some hours during the night.
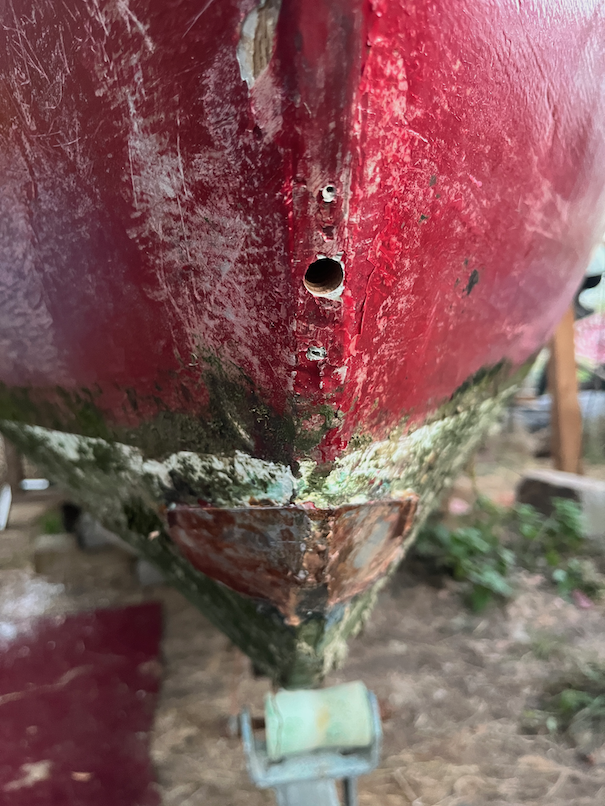
First thing in the morning I relit the charcoal heater and withdrew the brass rod. As you can see, the resulting hole is pretty good.
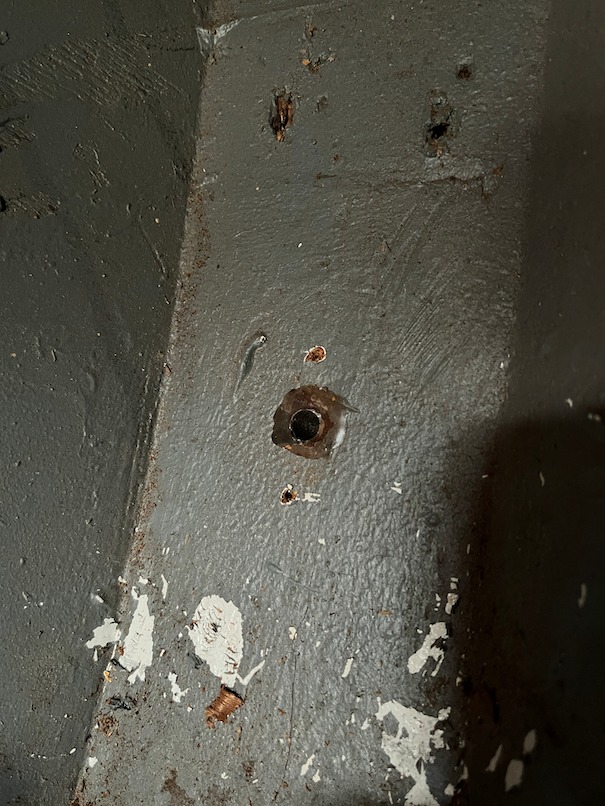
With the pad removed you can see the dark of the copper grease I used to ensure that the wooden pad did not get epoxied to the stem.
This is the inner pad and I think I may have overdone the grease a little but I doubt that any of it got into the epoxy.
The outside pad came off easily and left behind the squeeze out which I was able to pull off by hand. The hole has come out pretty well, not completely centered in the epoxy but more than close enough especially since some of the epoxy will have been absorbed into the wood.
Now I just have to resist doing anything heavy as the epoxy will take quite some days in order to fully cure. The bonding reaction slows down a lot in the cold but does not stop, meaning that it will not be able to resist a lot of stress until fully cured. I will be able to dry fit the eyebolt, fit the interior backing pad and the exterior ones as well if I decide to make them but I won't be able to put the eye bolt in place with sealant and tighten it up for a couple of weeks. I may even wait until the boat is in the workshop and has been warmed up with the heater in there before completing the task.
Still, I am happy at the result so far. now I have to wait for the eye bolt to arrive.
2022.12.05 - Waiting for Things to be Delivered
Not only is it close to Christmas but the Postal Workers are holding a number of one-day strikes which means that things are getting delayed unless they are sent by courier. A few of the things I am waiting for are in the post and as a result I am not able to continue on with certain tasks, so I'm filling in with other small tasks in the meantime.

One of those tasks is the centre plate. A rust converter was applied to the slightly rusty leading edge of the washed and dried plate and left to work for a few hours. After this time the excess was wiped off and the plate allowed to dry thoroughly.
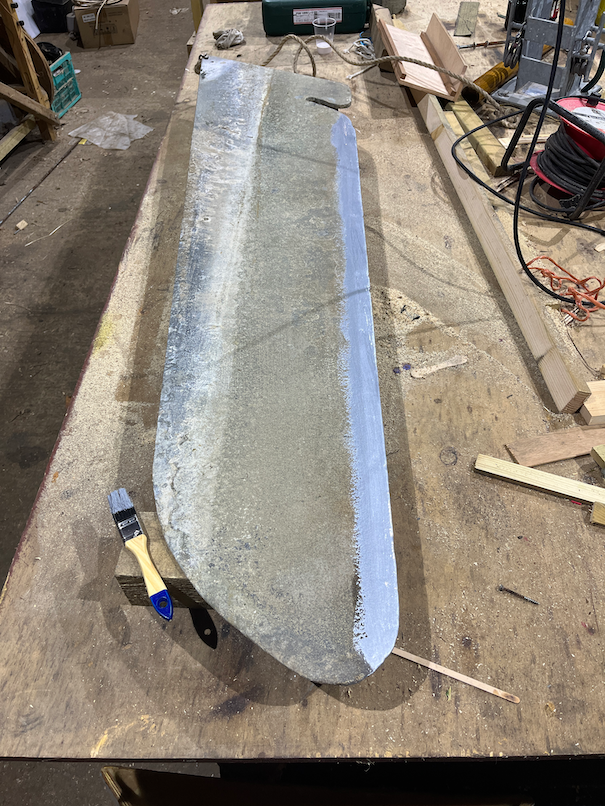
A cold galvanizing zinc paint was used to cover the leading edge on both sides and once the first coat had almost completely dried a second was added. Probably not necessary but it doesn't hurt anything.
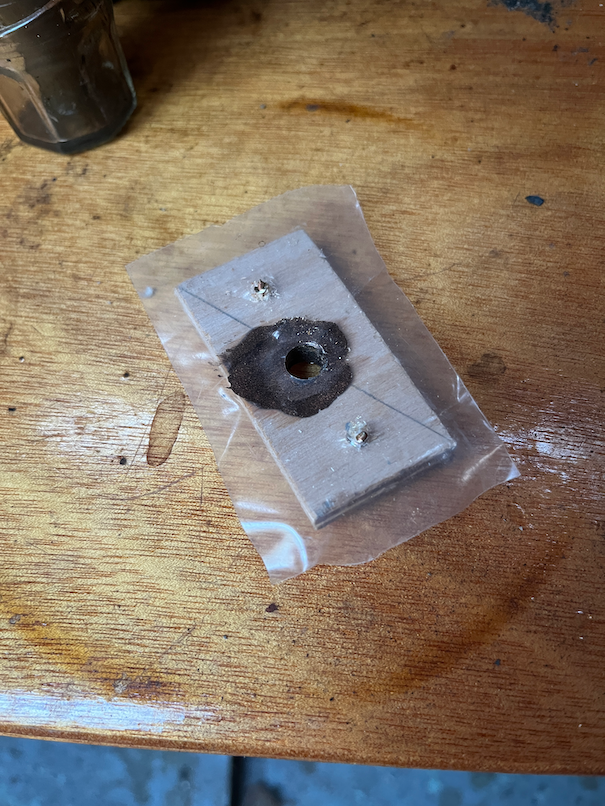
The hole in the stem presents a bit of a problem in that if left as is there is a chance that any upward pull on the eyebolt would damage the wood fibres of the stem. To prevent this the hole is drilled oversize and thickened epoxy put into the hole. Once cured the correct sized hole is drilled through the epoxy through which the bolt will pass. However, in this case re-drilling the hole is going to be problematic because of the curves of the stem so a different method had to be devised. Firstly, the hole was drilled out to 8mm, the diameter of the eyebolt. Two pads were made with an 8mm hole in the centre and two screw holes. An 8mm bolt was was put through the hole in the first pad, then through the hole in the stem form the outside and finally through the hole in the second pad on the inside. The wooden pads were then screwed in place and marked to show which way up they were mounted.
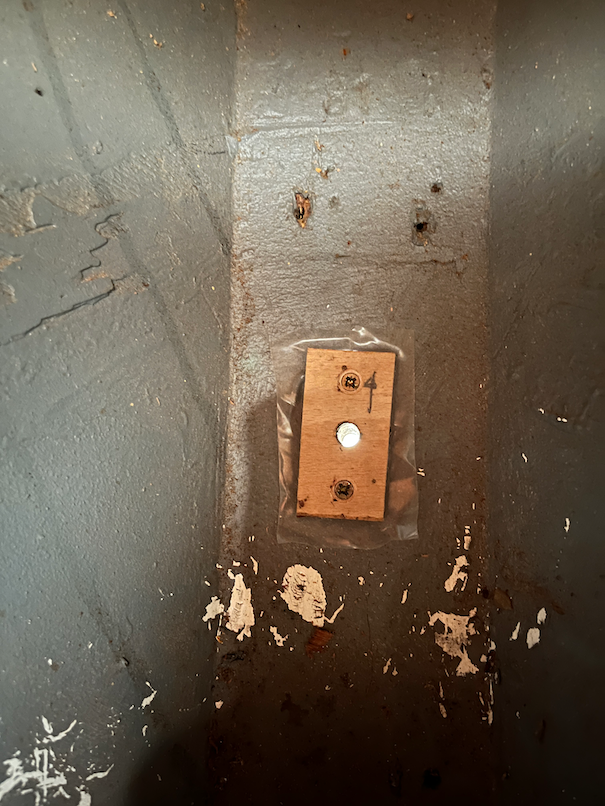
This is the pad on the inside.
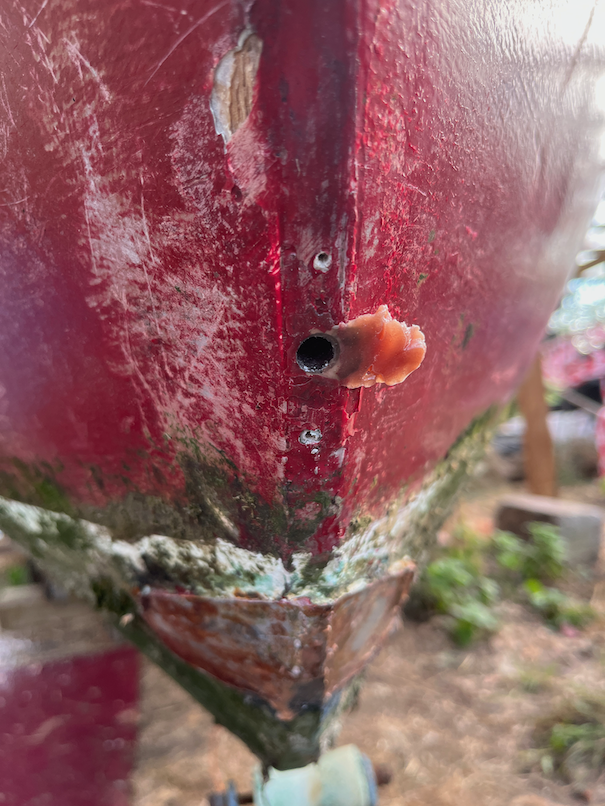
The two pads were unscrewed and put aside for the moment and the hole through the stem drilled out to 10mm.
Quite a large hole.
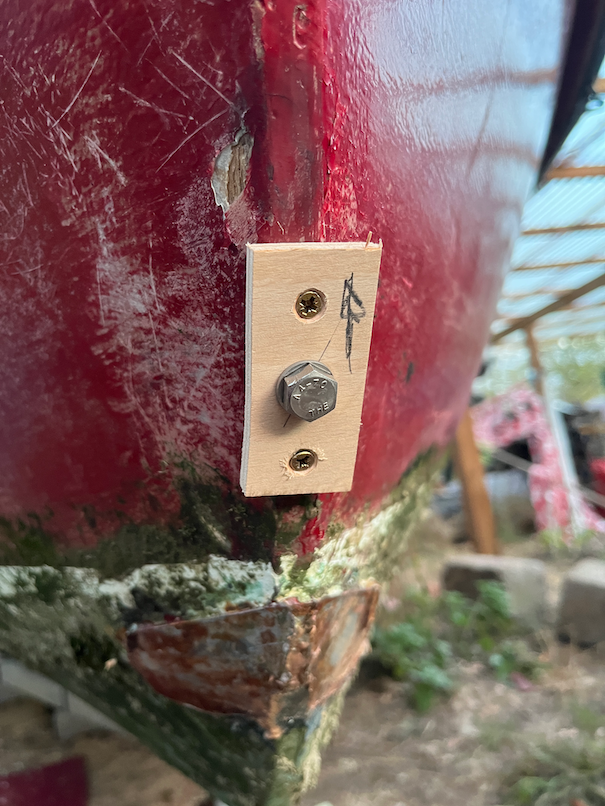
The idea is that the outside pad will be greased to prevent any epoxy from adhering to the wood, screwed back in place. Thickened epoxy will be pushed into the hole from the inside until it starts to come out of the hole on the outside. At this point the wooden pad on the inside will be greased and screwed into place over a thin plastic sheet that will close the hole. A small hole will be pierced through the plastic, say about 1mm, and a lightly greased 8mm brass rod with a pointed end pushed into the hole from the outside. This will force the excess epoxy out of the hole in the plastic on the inside until the pointed end of the rod pushed through the plastic.
At this point the hole through the stem will be completely filled with the remaining epoxy and the brass rod. Once the epoxy has completely cured the brass rod will be withdrawn, the wooden pads unscrewed and removed and that should leave a nice 8mm hole through the 10mm epoxy.
I hope.
However, the fly in the ointment is that the temperature forecast for the next few days is cold which is not good for the epoxy. So, I plan to put the small heater right up in the bow first thing tomorrow morning pointing at the hole in the stem and to turn it on and leave it for several hours. This should warm the wood of the stem so that when the epoxy is put into the hole the wood will be warm right through. The heater will be left in the boat on low for a few more hours so that the epoxy has a good chance to cure.
I hope, yet again.
2022.12.01 - Finding Things to do.
I have several things on order that should arrive in the next few days but until they do, several tasks that have been started cannot be completed. Take the chain plates, for example. The next step for these is the interior and exterior backing pads. But the wood and the metal have not arrived yet so I cannot make the pads and so the task cannot be completed. So I now need to look through my list of tasks to find those that can be started and perhaps finished without having to wait for something.
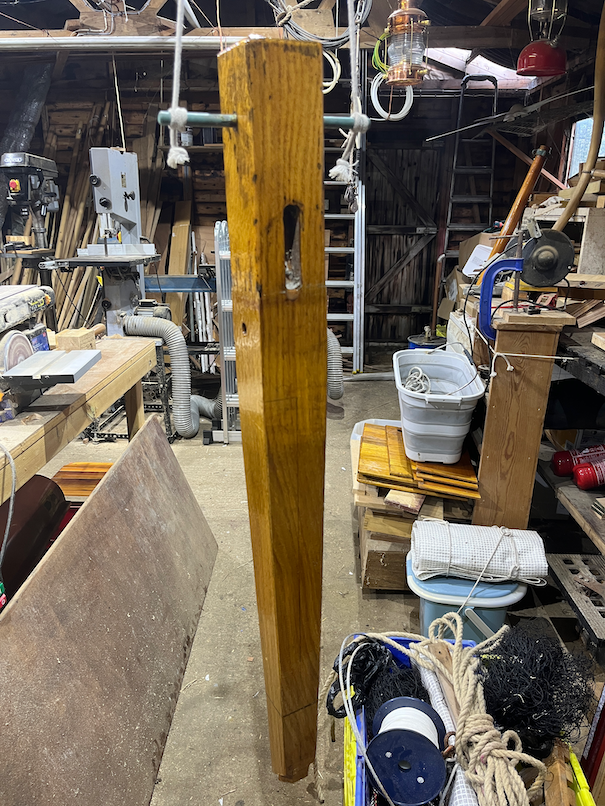
This is one task that can be completed, the sampson post. I have sanded it down to bare wood where needed and lightly sanded the existing varnish were heavy sanding was not required, hung it up in the workshop and applied a coat of varnish. This will need another five or six coats which should take quite a while since the temperature is not warm so the drying time of each coat will be at least a day if not more. I may have to take this into the house if the coats take too long to dry and hang it up in the work room for varnishing.
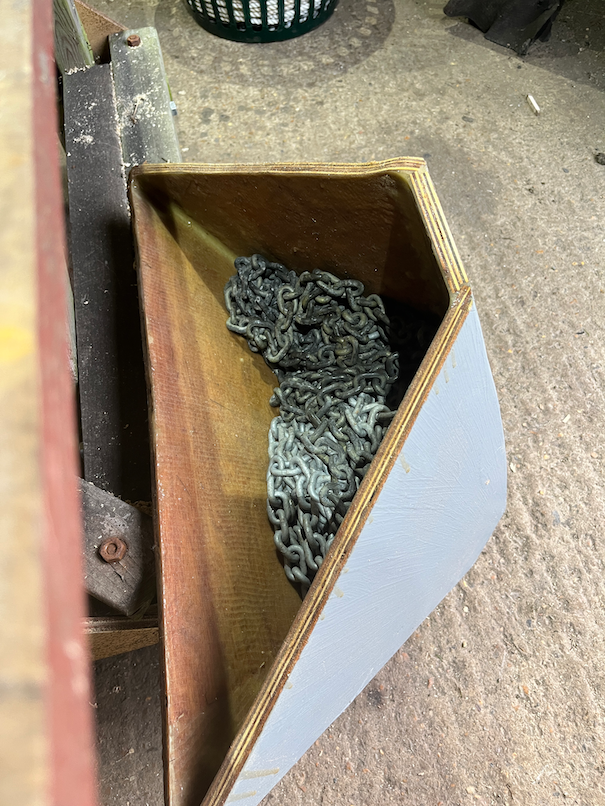
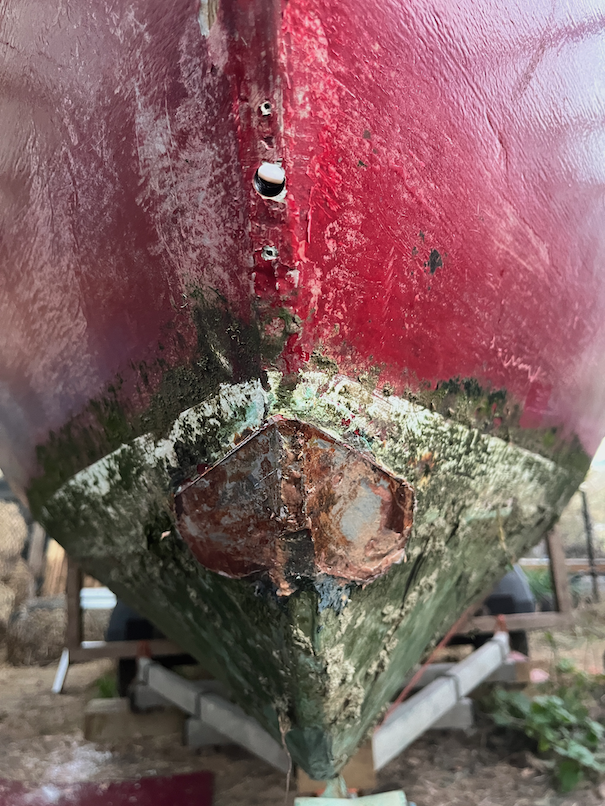
This is another task that needs to be done but has to wait until the eyebolt is fitted through the stem since the nut on the inside may well require a modification to the chain locker. However, I have put all the anchor chain into the locker to see how much I can cut off the top.
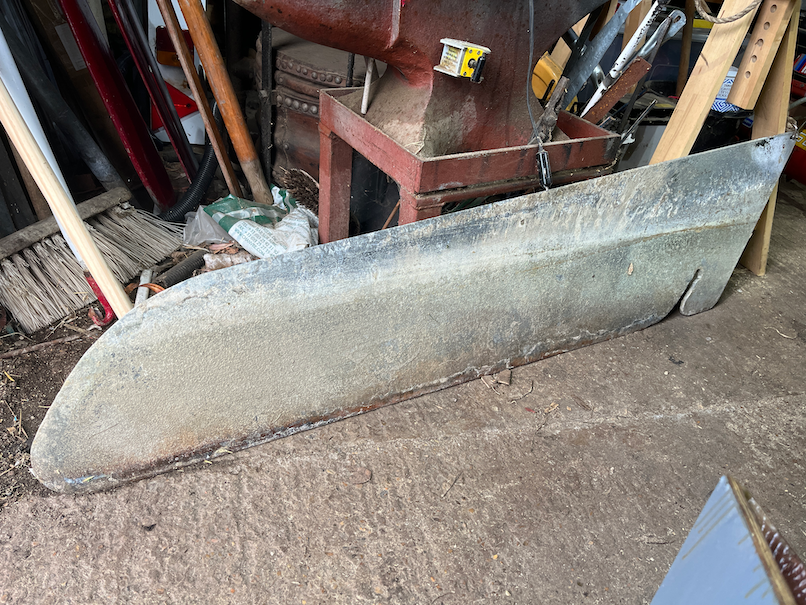
This is another task that can be done. As you can see the edge of the centre plate touching the ground is lightly rusted. I'll need to put some rust converter on that after wire brushing the loose stuff off followed by some zinc paint. It has been sitting in the workshop to dry after being washed so it should be ready for the next step.