2020.10.17 - Two Varnished Bottom Boards
Just a quick note today to show the completed boards in the boat. I have limited clear flat space in the workshop on which to place the boards once they are done so I thought that a better place would be for me to put them in the boat out of the way. Then I'll have space to varnish the rest.
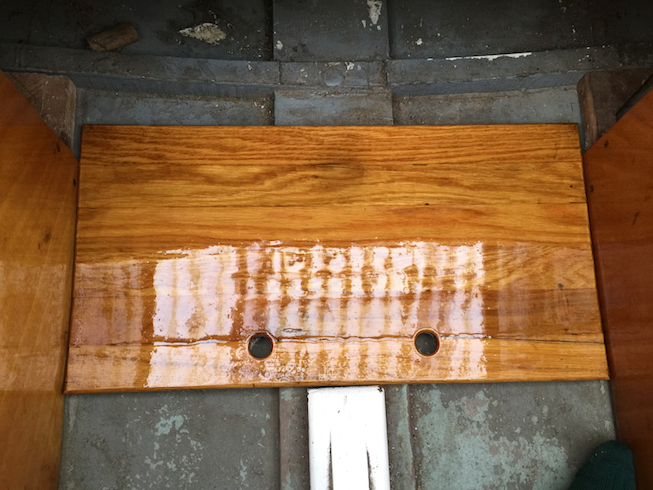
The aft most board with the reflection of the corrugated roof showing.
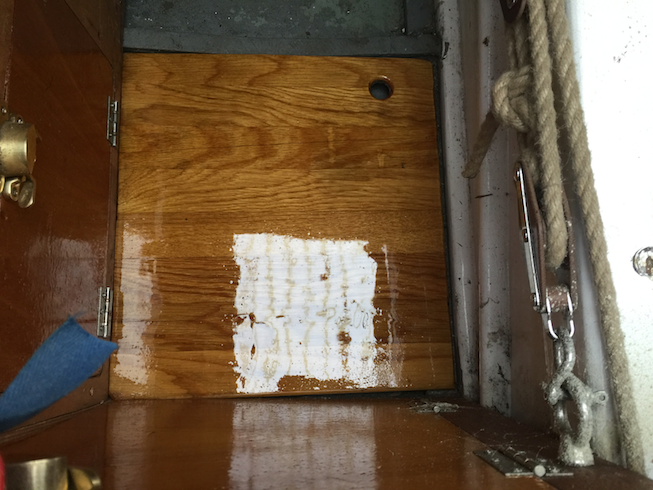
And the aft port cabin board. Again the reflection of the corrugated roof.
As you can see from these two photos, the finish is good and probably too good especially since a lot of the time these boards will be covered.
Time for a cup of tea.
2020.10.16 - Yet More Varnishing
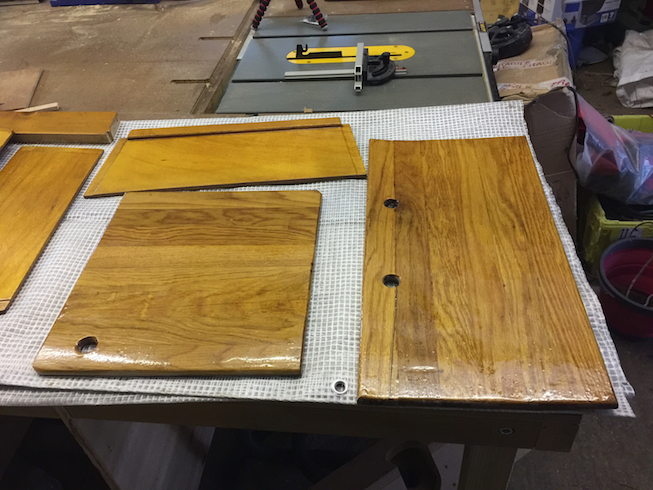
Having varnished two of the seven bottom boards and the three washboards, I turned my attention to the remaining boards. Sanded the upper surfaces to get a key and then on with a coat of varnish.
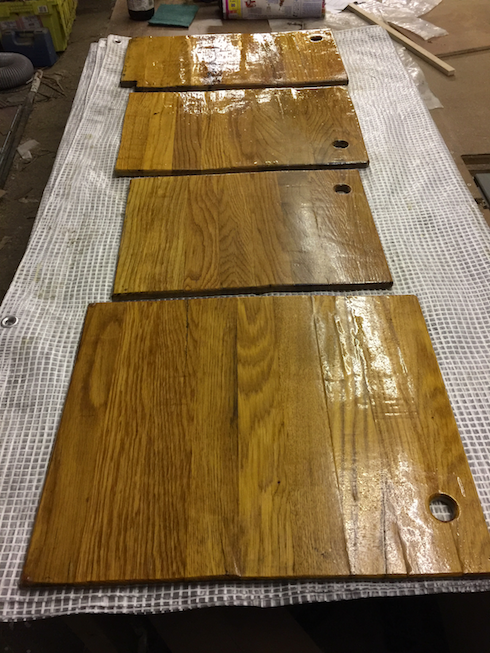
Here they are with the first coat applied.
Only the observant among you will have noticed that there are only four boards here. These plus the two I've already done means that there is one missing.

It is the companion board to this one. This is the port side cockpit bottom board and the one for the starboard side is missing. I looked high and low for it. I definitely wasn't in the boat and I could not see it in the workshop. Eventually I had a look in the storage container just to satisfy myself that I wouldn't have put it there and guess where it was?
Yes, indeed, on a shelf with some other boat stuff.
I whipped out the sandpaper gave the top side a quick sand, realised that I had the thing upside down and had just sanded the underside, turned it over and sanded the real top side and gave it a coat of varnish.
Now here's an odd thing. I'm running out of halfway decent 1" brushes so I decided to put on the first coat with some really bad disposable brushes that I normally use for spreading glue. I was fairly astonished to find that these brushes applied the varnish far better than the more expensive ones I had been using. Not the real varnish brushes that I just bought, those ones give an astounding finish. No, the ones I had been using are reasonable ones from Silverline.
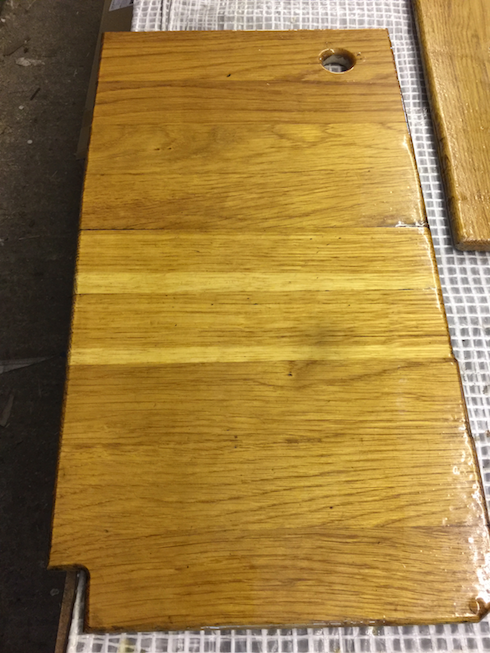
Here is the board with its first coat. A lovely finish, no bubbles, or very few, and I could use the same brush to tip off the varnish after applying the coat. How strange. I think I'll use these brushes for the varnish in future.
The only problem is that I'm running out of those as well!
Time for a cup of tea.
2020.10.16 - Le Tonkinoise Varnish & West System Epoxy - Part 3
Way back in the middle of August, two months ago now, I epoxy-coated a piece of wood using peel-ply to ensure that no amine blush remained on the surface of the epoxy and that it was ready to be coated with varnish. Since that time I have added more coats of varnish, about ten in all.
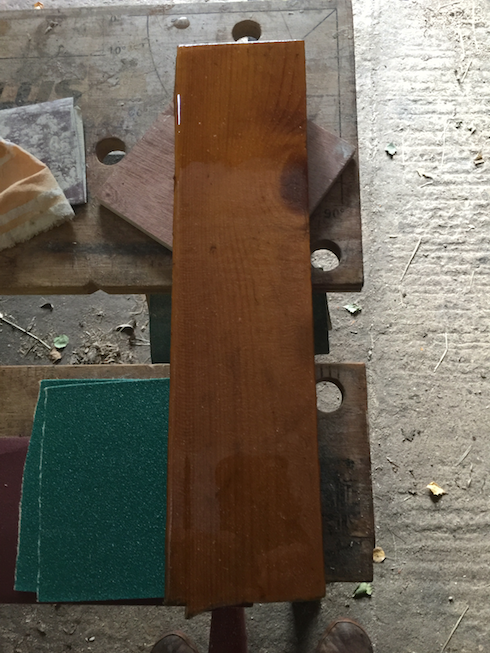
Here is the result. Not a bad finish all told.
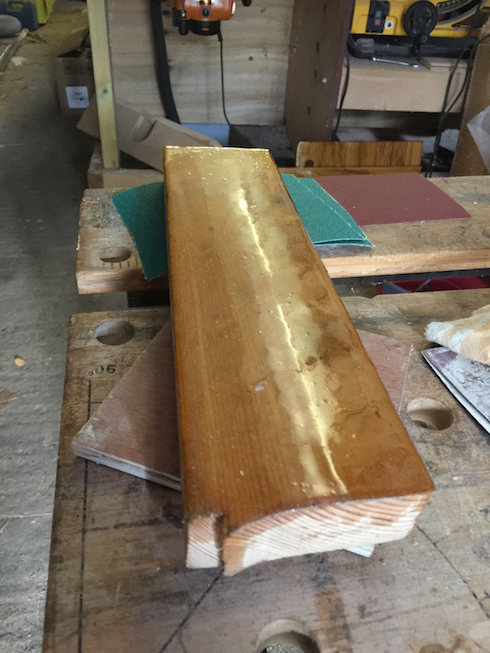
Another view and although there is a little moisture on the surface due to the temperature and humidity, you can just about see that the surface of the varnish is fairly good.
The bad news is that it took over a month for the first coat to harden to a point where it was not tacky to the touch. Subsequent coats went on normally, but that first one took an age to go off and that was in a warm environment.
So the conclusion of this little experiment is that sellers of the varnish are correct when they say that they do not recommend using Le Tonkinoise varnish over West System Epoxy. You can do it, but it is not a straightforward task.
2020.10.06 - The Varnishing - Again! (Edited)
I have another problem with my varnish. It's laying flat now that I remove the shine before putting on the next coat but the problem I now have is that I always get small bubbles in the varnish that don't disappear and when the varnish is dry, and the surface is marred by these bubbles.
It seems that the bubbles are caused by my using a paint brush to apply the varnish. No matter how careful you are, if you use a paint brush you are likely to get these small bubbles forming. The reason, so it seems, is that a paint brush is designed for, well, paint. The bristles are fewer and thicker than you should use for varnish and as a result air is easily trapped in the bristles when you load the brush with varnish and transferred to the varnish when you brush it on the surface. Paint, being thicker, doesn't suffer the problem.
So what should I do?
One good way to get a fine varnish finish is to apply it with a 4" foam roller fairly quickly and rolled well to ensure that the varnish is well distributed and then, before the varnish starts to harden, tip it off with a very fine brush to remove the bubbles which will be plentiful due to the foam. Badger hair bristles are suppose to be the best for this so I have bought two fine brushes, one synthetic and the other badger hair and I have to tell you, a badger hair brush is expensive.
It also means that instead of throwing away the brush after use I shall have to clean it but since the brush is for tipping off and not application, it should be easy to do.
I hope.
I'm not going to be able to get a very fine finish since I am either varnishing outside or in the workshop and it would be a great deal of trouble to build a dust-free environment in either pace. So I'll no doubt have dust and possibly even small insects in the finish, but hopefully no bubbles.
[Edit 2020.10.08]
I have received my two new brushes and decided to give one of them a try. I applied the varnish with a paint brush, just slopped it on any old how, then I used 4" foam roller to roll over the varnish a number of times to even out the coat. This put lots of bubbles in the varnish. Then I used the synthetic brush to tip off the coat and lo and behold, no bubbles
There's still dust and insects getting on the varnish but no bubbles.
Deep joy !
2020.10.04 - The Varnishing Continued
Have you ever noticed that quite often something is both an advantage and a disadvantage at the same time?
The current weather is like that right now. The temperature is cool enough that I don't have to worry about getting varnish on fast before it starts to harden but the disadvantage is that it takes longer to harden so I can't put on the coats as fast as before. Previously I could get a coat per day applied.
Take the varnish I put on yesterday. A month ago it would have been fully hard by now, a day later, and I could sand it and put on another coat. But it's still a little tacky today and it may well be tomorrow or the day after before I can continue.
So, instead I did some more varnishing of other things.
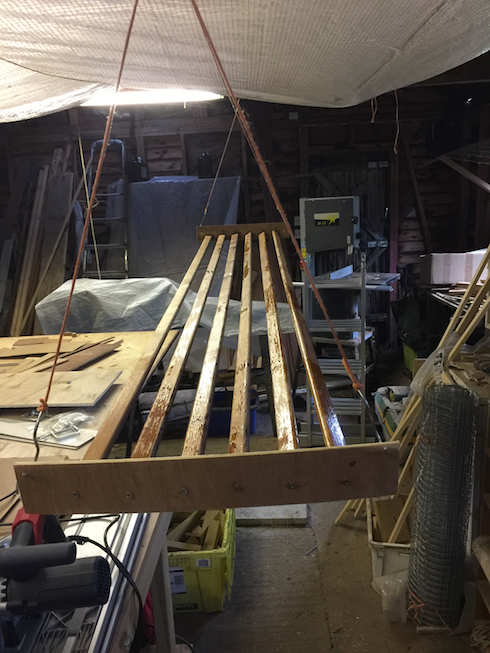
Here are two of the seven bottom boards. One is being glued up as it had cracked and the other four are still in the boat as I don't have enough open flat space on which to put the board so that they can be varnished. I'll have to do them two at a time.
The other varnishing I did is not for Naiad at all. We have this Victorian style drying rack for the washing but the battens can leave brown marks on the laundry when you put it over the to dry. So I'm going to apply a few coats of varnish to each one to prevent that happening in future. I tried out one to see how it went and now that I can see that it is covering well I'll make a holder for all six of the battens so that I can varnish them all at the same time. Shouldn't be too difficult as I have screwed in a short screw at each end and can use that to support the batten.
But that will have to wait until another day since I now have wet varnish in the workshop preventing me from doing any construction work for the rest of the day and possibly even tomorrow as well depending on how dry the varnish becomes overnight.
Time for a cup of tea.
[Edit]
I changed my mind and found a way to hang the battens without creating much in the way of dust.
And here is the result. the batten on the left is the one that I varnished this morning and the varnish has completely soaked into the wood.
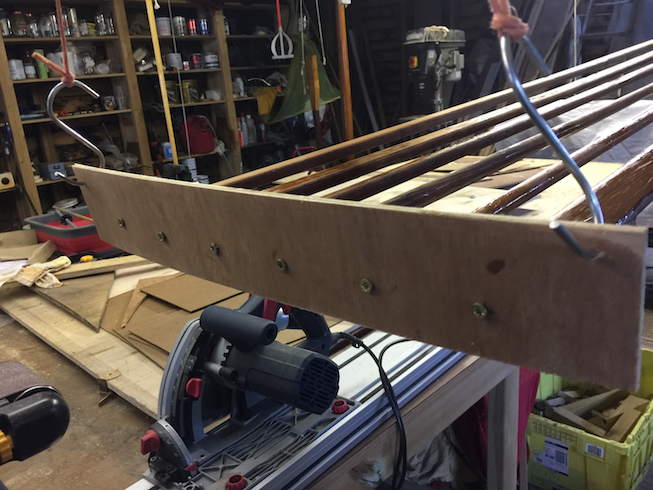
The supports consist of two pieces of gash plywood with eight holes. Six for the screws in the ends of the battens and two fo the hooks.
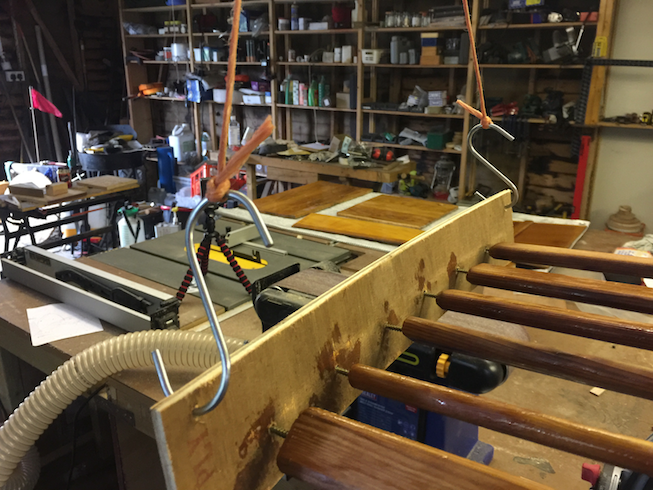
Another view of the support. This works quite well and I was able to coat the other five battens in about 20 minutes. It took a lot of varnish to do this the first time as the wood was a bit like a sponge. The second coat should take a bit less.
These should be ready to re-coat tomorrow along with the pieces to which I applied varnish yesterday.