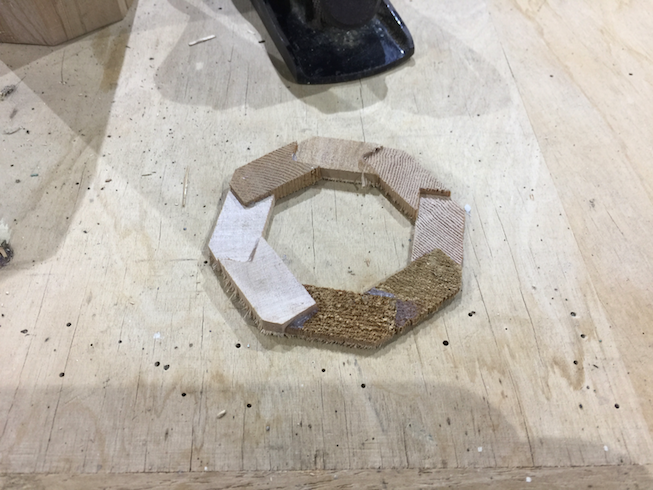
2021.07.12 - Bird's Mouth Test Spar
When I made the mast for Naiad I took the dimensions of the mast diameter from a number of photos of Shoal Waters. Due to the small size of these pictures and the difficulty in finding a suitable known length on the photos the diameter was a pure guess.
I had already decided to make her mast hollow and the calculations show that you need to increase the diameter of a hollow mast by around 5% compared to a solid mast in order to make up for the reduced strength.
So, I over estimated the mast diameter and then added 5% and rounded to the nearest reasonable dimension and ended up with 100mm or 4". As it happens, this is much bigger than necessary, but as the mast is hollow, it is probably not that much heavier than the mast of Shoal Waters.
For the Northumbria Coble, only 18" shorter than Naiad, the mast diameter is given in the plans and is 70mm or 2 3/4". Increase that by 5% gives 73.5mm and divide that by 2.5 to give the mast strake width to get 29.4 mm. Well, that's close enough to 30mm, so that's what I'll use. A strake of 30mm wide and 15mm thick should result in a spar with a diameter of 75 mm or just under 3".
I noticed the other day that I have some left over Cedar strips that are a little wider and thicker than these dimensions so just for fun I cut them down to the correct dimensions, cut a suitable notch in one side and glued them together with some ordinary wood glue.

Here is the result. The Jubilee clips were bought for Naiad's mast but were too small. They fit nicely for this spar as you can see.
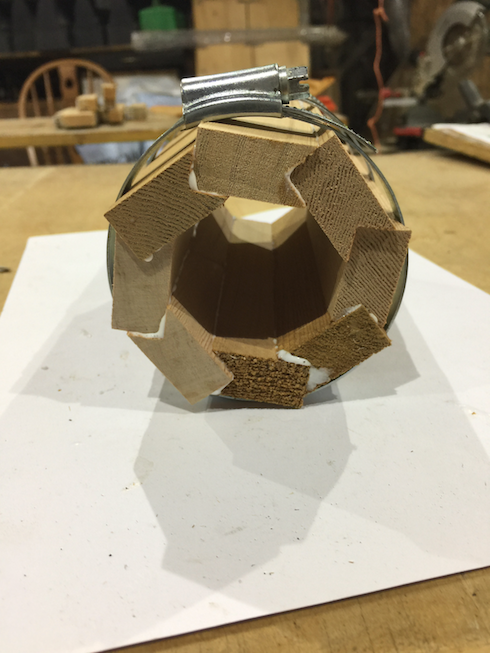
These strips were cut with the new table saw, unlike Naiad's mast, so the fit is very good.
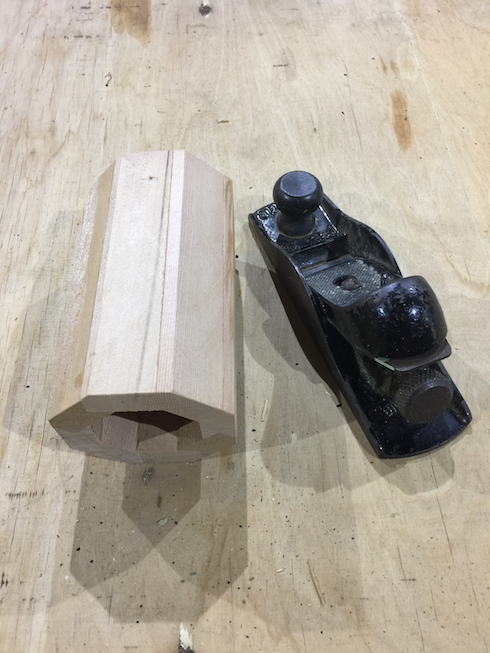
Once the glue had dried overnight I used a block plane to remove the proud corners. The plane used to belong to my Dad but he generously allowed me to have his tools and other woodworking stuff when he and Mum moved house. Since I can now made the blades really sharp I am able to use the plane as it should be used. Previously I would have used the belt sander to do the job.
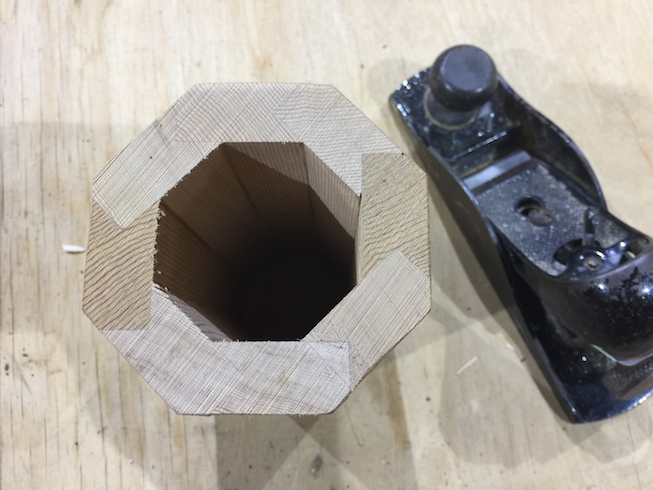
One end of the test spar was once and squarest the other was not. Here you can see that end cut square and sanded a little. The joints are very tight and I am very pleased with how it has come out.
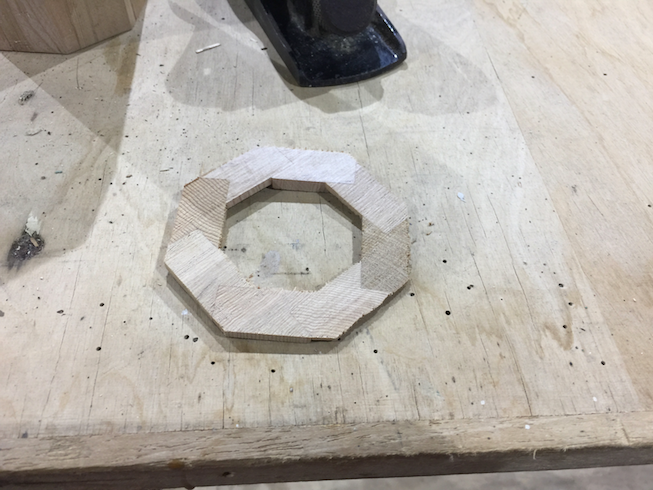
This is the piece cut off to level the end. The advantage of a sharp bandsaw blade is being able to make very thin cuts like this.
This is the reverse of the cut off showing the uneven ends.
The diameter across the flats of this test spar is 75.5 mm and very close to the required dimension, so a 30mm x 15mm strake size is going to be perfect for the mast.
When I get to that part, that is. For now, this test piece will be put on a shelf out of the way and will wait until the time when the mast needs to be made.
Time for a cup of tea.
2021.05.19 - How to Cut 144 Notches Accurately
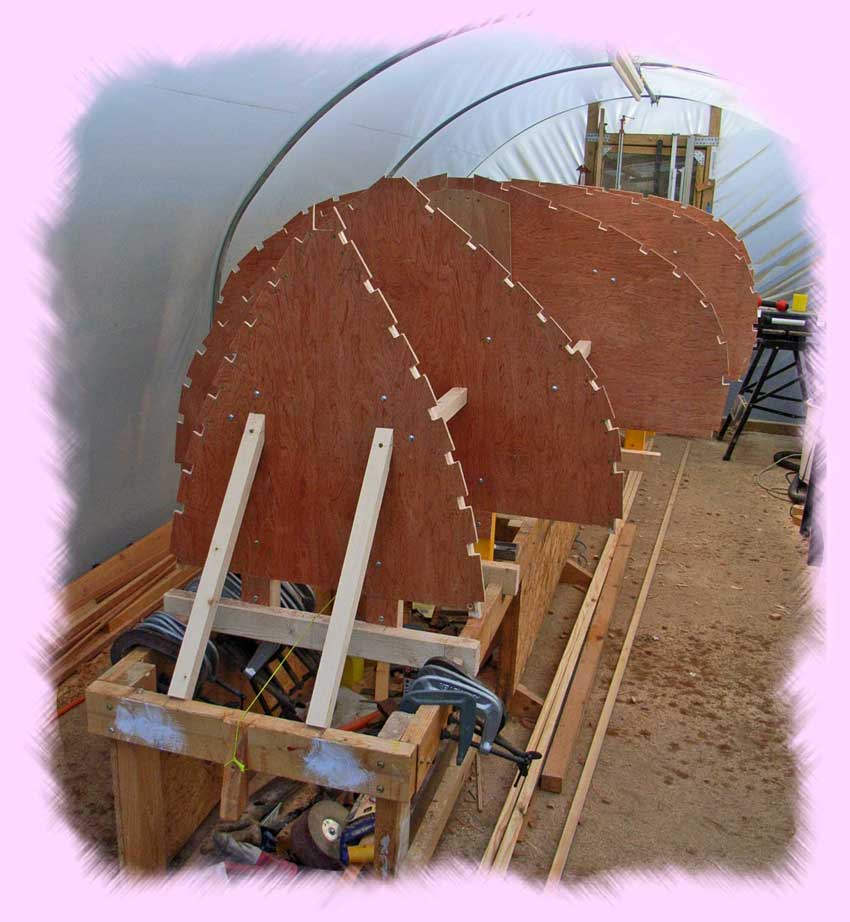
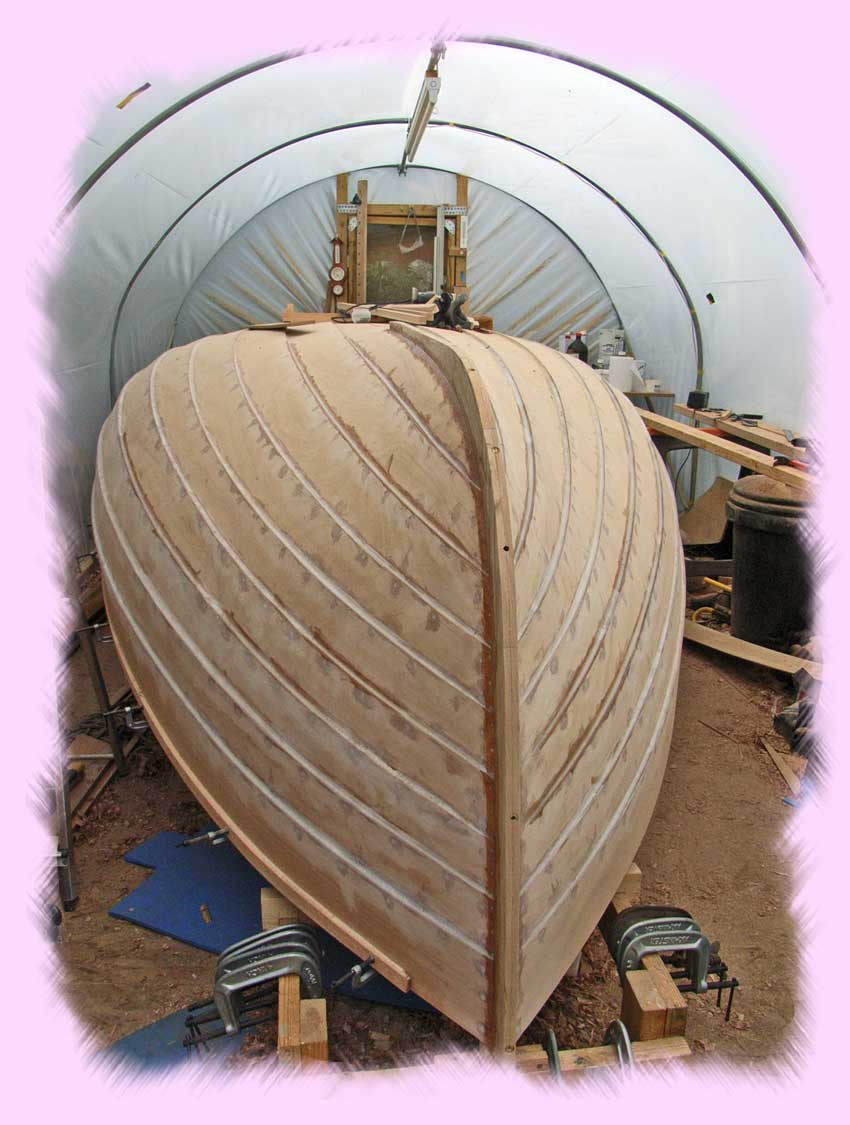
The mould and frames for the coble form the shape of the boat at intervals along the length of the hull. Pieces of wood, known as ribands, define the shape of the boat longitudinally and are set into notches in the frames and moulds.
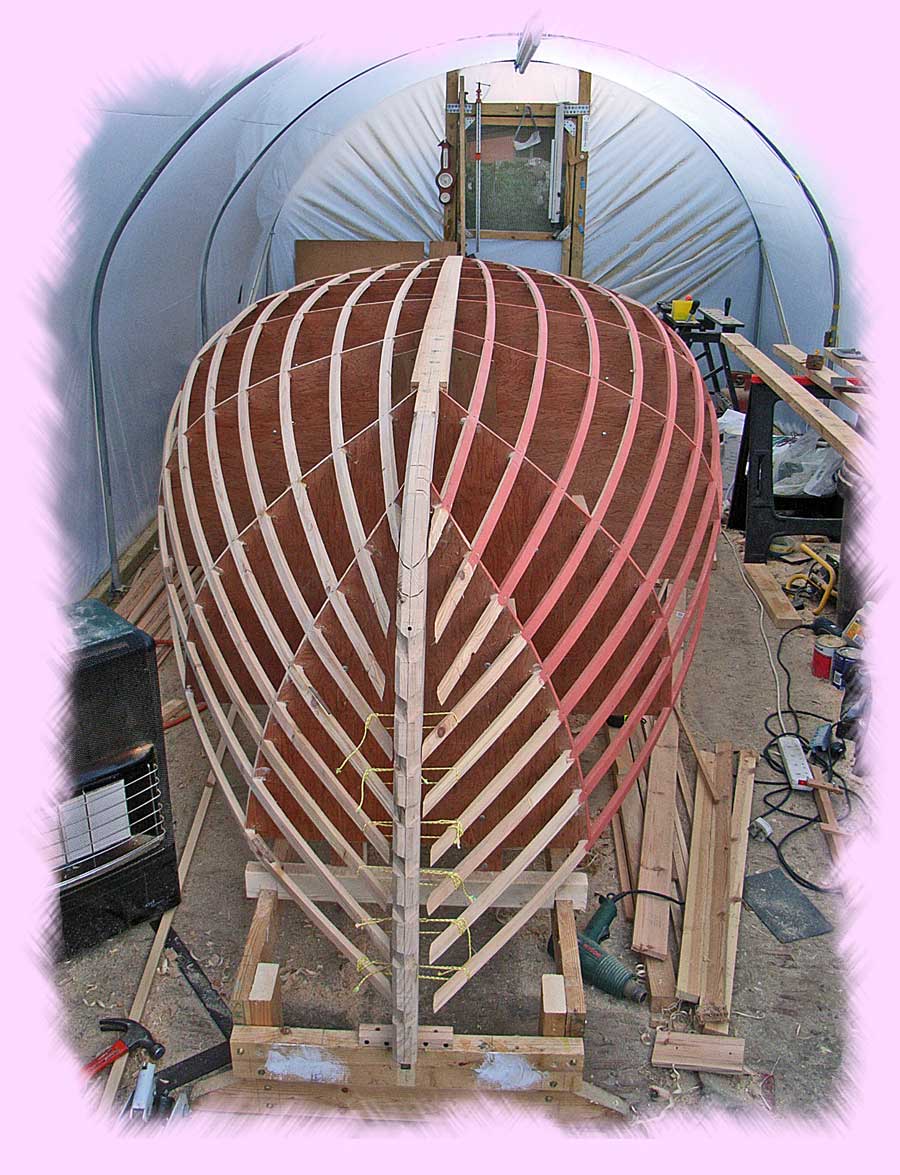
Here you can easily see the two forming the entire shape the hull.
As you can imagine, the more accurate the frames, mould and ribands, the better the boat will be.
The task I am currently contemplating is how to cut the notches into which the ribands are set. They need to be accurate, precisely placed and easy to cut.
Here is a photo of the notches in the 8 frames and there are 9 notches per side.
If this were just one or two notches, then I'd drill holes in the corners and a jigsaw to cut out the waste. But not for 144!
My best guess so far is to create a jig and use a 6mm (1/4") straight router bit. The jig would be clamped in place and the router use to cut out the waste. Whilst cutting out the waste is quick and easy with this method it does leave rounded corners and I have the choice to either use a fretsaw or chisel to square off each corner or run each riband over a 6mm round over bit one the router table so that the two rounded corners on the riband fit into the rounded corners of the notch. This last one seems to be a lot easier and quicker to me.
The difficulty with the jig and router method is finding a way to accurately locate the jig on the workpiece.
I'm thinking about that.
Decisions, decisions !
2021.05.03 - More Construction Thoughts
Now that the workshop has been repaired and the new lighting installation has started, the working area of the workshop is becoming a lot less cluttered as I have to clear spaces in order to place the stepladder in a safe position. This fairly naturally means organising the mess on the floor and putting things into places that they either lived before the leaks, or should have been put all along.
All the concerted effort has encouraged me to think about the new boat. For example, the aluminium mast that came with Naiad has been stored in the workshop rafters since Naiad first arrived here and I have had to move it out of the way whilst I installed one of the new lights. Firstly, I should really put the mast up for sale somewhere and secondly, should the new boat have a lowering mast?
The plans call for a mast that is simply lifted into place and since it won't be that long or heavy that could be sufficient, if I were young and fit, but I'm neither and frankly, lowering the mast by lifting it up and out of the mast step has always been a pain even when I was young and fit.
So,I'd really like to have lowering mast. But that has it's own problems. With such a mast, as you can see from Naiad, you need to have a permanent forestay or the mast simply falls down when you lower the jib.
We are going on a Broads cruise in a few weeks time and that reminded me that Broads sailing boats have counterweighted lowering masts where the tabernacle reaches from the keel to the pivot point allowing the mast to be supported by the tabernacle so that a permanent forestay is not needed. At least not on a small boat.
This is a short clip from Martham Boats showing how to lower and raise a mast on one of their sailing boats and you can easily see what I'm talking about. Martham Boats are a great boatyard for wooden sailing boats, the only disadvantage is that they are situated upstream the very low bridge at Potter Heigham meaning that to get anywhere other than Hickling Broad and Horsey Mere, you have to get through that bridge.
So, I think this will be the way to go. The mast will pivot just above the foredeck but the heel of the mast will still be down near the keel and a metal mast-gate will clamp across the front of the tabernacle down low preventing the mast from being lowered.
There's no point in counter-weighting the mast on such a small boat, however, it's too light to be needing that.
Decisions, decisions...
2021.04.27 - Project Layout
The coble project is going to be quite a long one, so I shall break it up into smaller sections to make the reading little easier. Broadly speaking, the major topics will be:
- Building jig
- Building the hull
- Fitting out the hull
- Building the spars
- Finishing
Pages for these topics have been added to the site but will remain blank until work begins on that particular part of the project.
Topics that do not fall under those headings will be posted on this page. Hopefully, in this way the huge list of posts that will accrue during the project will be a little more manageable.
2021.04.16 - Northumbrian Coble
I have really missed boat building, and since Naiad was initially launched the only boat work I have carried out is repairs and modifications to Naiad. Whilst that is quite satisfying in itself and I enjoy the results, building a boat from a pile of timber something else entirely and I really enjoy it.
So, I plan to build a Northumbrian Coble next year, starting in the Summer and continuing on through the Winter with the intention of have her ready to launch sometime in the Spring of 2023. Why a Coble and a Northumbrian Coble at that?
It started a couple of years ago when a friend of ours showed a photo of some boat sketches he'd found hung on a wall somewhere.
I was really taken with that hull shape and did some research on Northumbrian Cobles as a result. When I decided to build another boat I revisited the Northumbrian Coble and decided that this was the one that I'd build next.
She will be built using a construction technique called "Clinker Plywood" as I haven't used this technique before and it results in a very traditional looking hull but without the intricacies of traditional clinker.
The boat plans are from Selway Fisher, a notable boat designer of some experience, and details of the boat can be found on the Selway Fisher web site here. The boat is large and roomy (15' long 5' 10" wide or 4.57m x 1.77m) and I will be building the nine-plank version, Gunter rigged with a single mast.
There are several articles on the Internet showing that several of these boats have been built before and one has some interesting comments and photos. The builder made a number of changes to the layout of the boat, some of which I agree with and will probably incorporate and some of which I disagree with including one that I consider to be a major failing and could compromise the integrity of the hull should the boat hit an underwater obstruction that hits the centreboard sideways whilst sailing with the centreboard lowered. So that one will not be included.
Now, I plan to start the boat build next year, but will start the preparations now. There is a fair bit of pre-build work that has to be done before starting the boat itself. For example, the building jig has to be constructed. This defines the shape of the hull and the planks are joined together around the jig. Once all the planks have been glued together to form the hull, the hull is removed from the jig and the interior is constructed.
Here is a photo of such a mould taken from a website called martin boat building blog (used without permission as there seems to be no way to contact Martin in order to get his permission. Martin, if you're reading this, please contact me admin @ svnaiad . uk).
Here you can see the moulds over which the ribands have been fitted. The stem, hog and transom are also in place in this photo as the planks will be fitted to these and they will be lifted out of the jig once all the planks are glued in place.
Here is another photo from Martin's website showing all the planks in place.
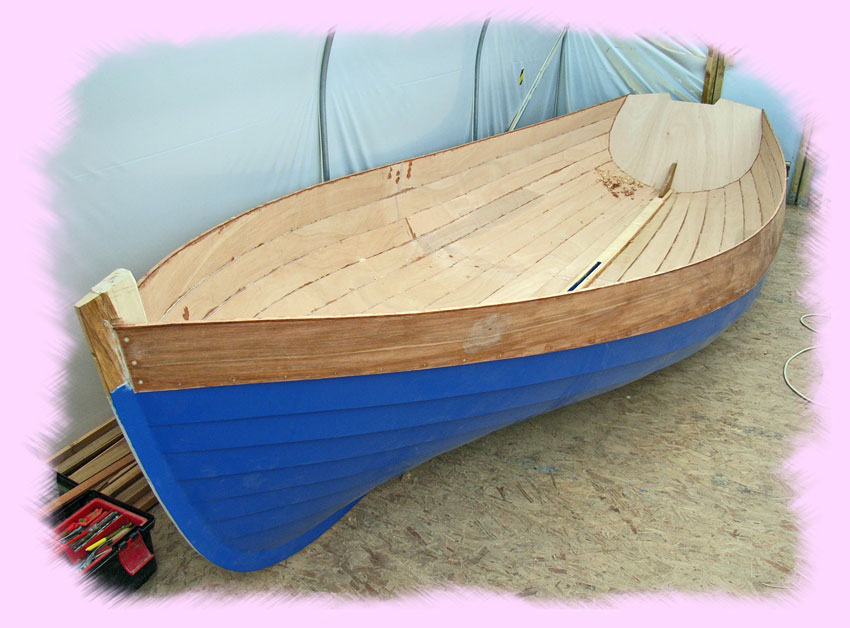
And another showing the competed hull removed from the building jig.
So, this building jig needs to be constructed, including the stem and hog. The transom will be a temporary one initially and replaced with a "real" one later. Having done that the patterns for the nine planks have to be made, taking the lines from the building jig. These will be made from cheap plywood and used to make the "real"planks from marine plywood when the building starts. The five plank version has the measurements for the planks in the plans, but not the nine-plank version.
So why the nine-plank version if the layout for the five-plank version is in the plans? Well, to my eye the shape of the five plank hull, although sweet, is just a little too chunky whereas the nine-plank version is a much rounder hull shape. I guess the real answer to that question is that I prefer the look of the nine-plank hull, and since I'm the one building it, that's all that counts.
The jig is build on a frame, known as a strong-back, and mine will have wheels so that I can move it around the workshop, or even out of the workshop if needs be, allowing me to do other work if required.
Much of the building jig will be made from wood that I already have in the workshop which will also help me to clean up the wood pile bomb site that inhabits the rear of the workshop. I'll also able to use a lot of the fittings that originally came with Naiad that weren't used in her rebuild. That in itself is nice as I didn't want to throw them away and probably couldn't sell them either.
In fact, the first thing to do is to sort the workshop out as it is pretty much a disaster right now. With a gaping hole all along the apex of the roof, many things in the workshop are covered in tarpaulins to keep them dry. Over on the Captain's Table you can read about the progress of the repairs to the roof and once this is done I will need to sort everything out.
So, that's where the physical part of this tale will begin. Up 'til then I'll be researching and working out how this is to be done.
Of course, I don't want another boat for myself, so once she is built and I've had a sail in her once or twice, she will be found a new owner to sail her around.
Stay tuned.